 0
/5
0
/5
0
/5
0
/5
.jpg)
The mezzanine panels can be installed to create a complete floor surface, mezzanine floor or intermediate floor suitable for the storage and transport of goods. Hand pallet trucks for transport should ideally be equipped with a dual steering wheel and double tandem wheels to help distribute the load, reduce point friction and minimise wheel wear. If laminated floor panels (Deluxe and Antislip) are installed, we recommend the use of soft wheels instead of hard polyamide wheels. The stamp of racks must have minimum dimensions of 50 mm x 50 mm. Larger dimensions are better at distributing the load.
A leveled supporting steel structure is required to ensure a leveled basis for the floor panels and to rule out differences in height between the individual panels. This difference in height, referred to as ‘stepping’, can give rise to erosion or damage to the surface of the floor.
.jpg)
The illustrations used in the technical manual are for information purposes only and in no way constitute structural detail for design or stability studies of a Mezzanine floor. Structural details are developed by the project architect or engineering offices.
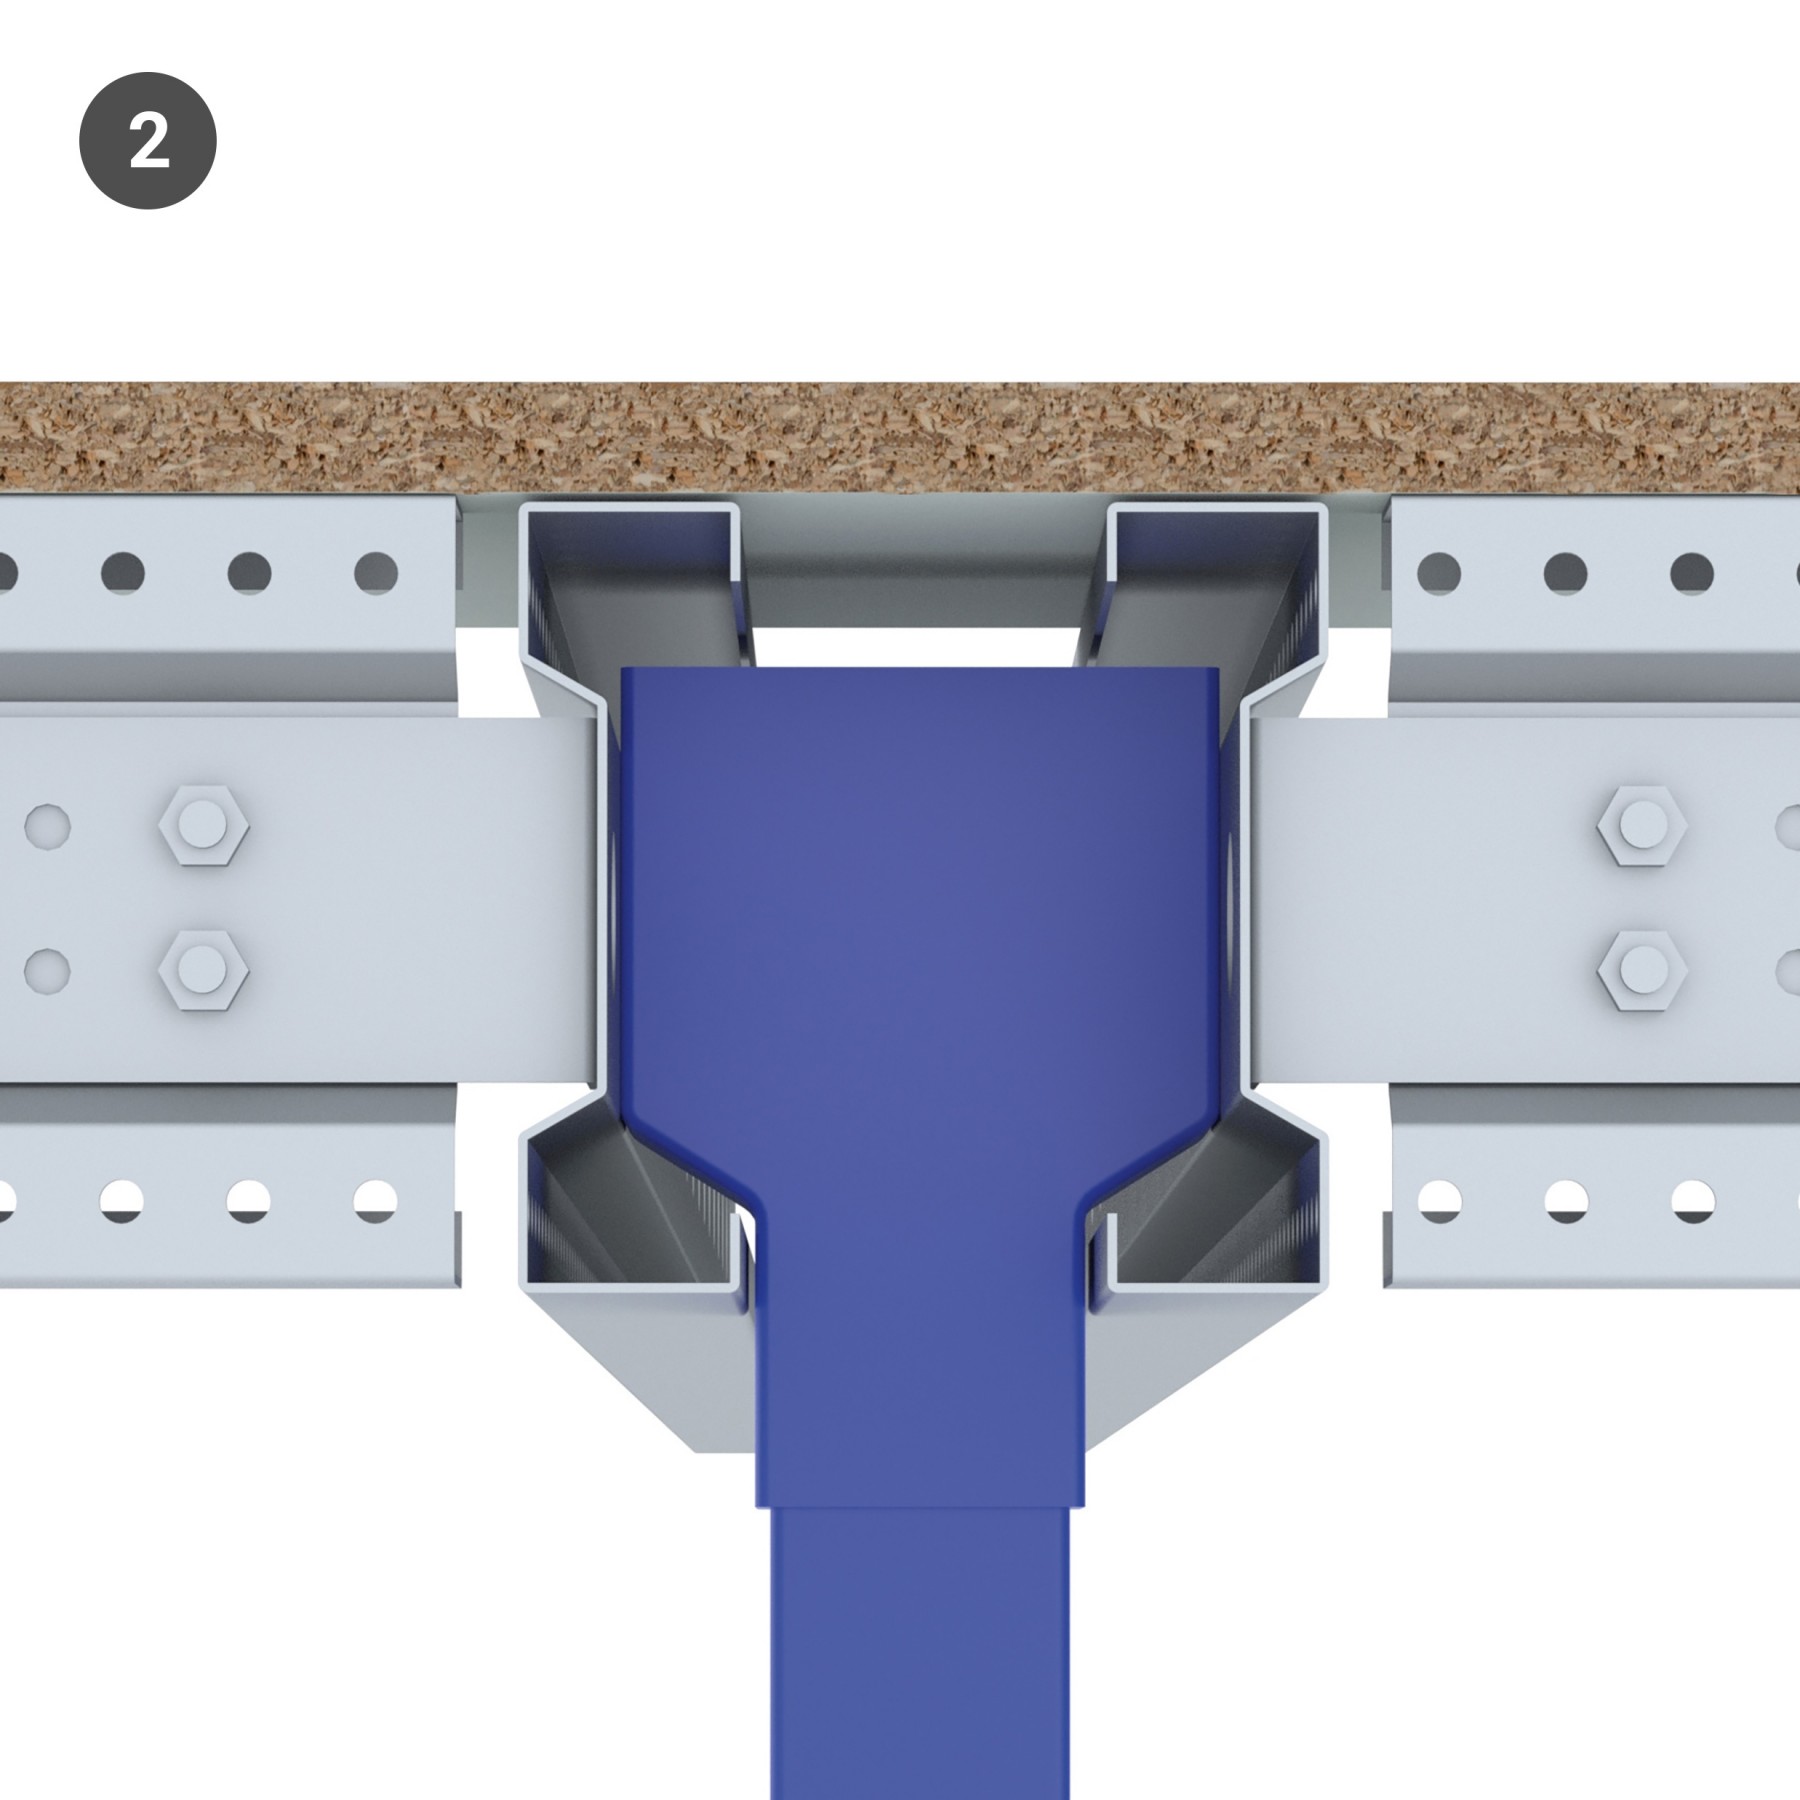
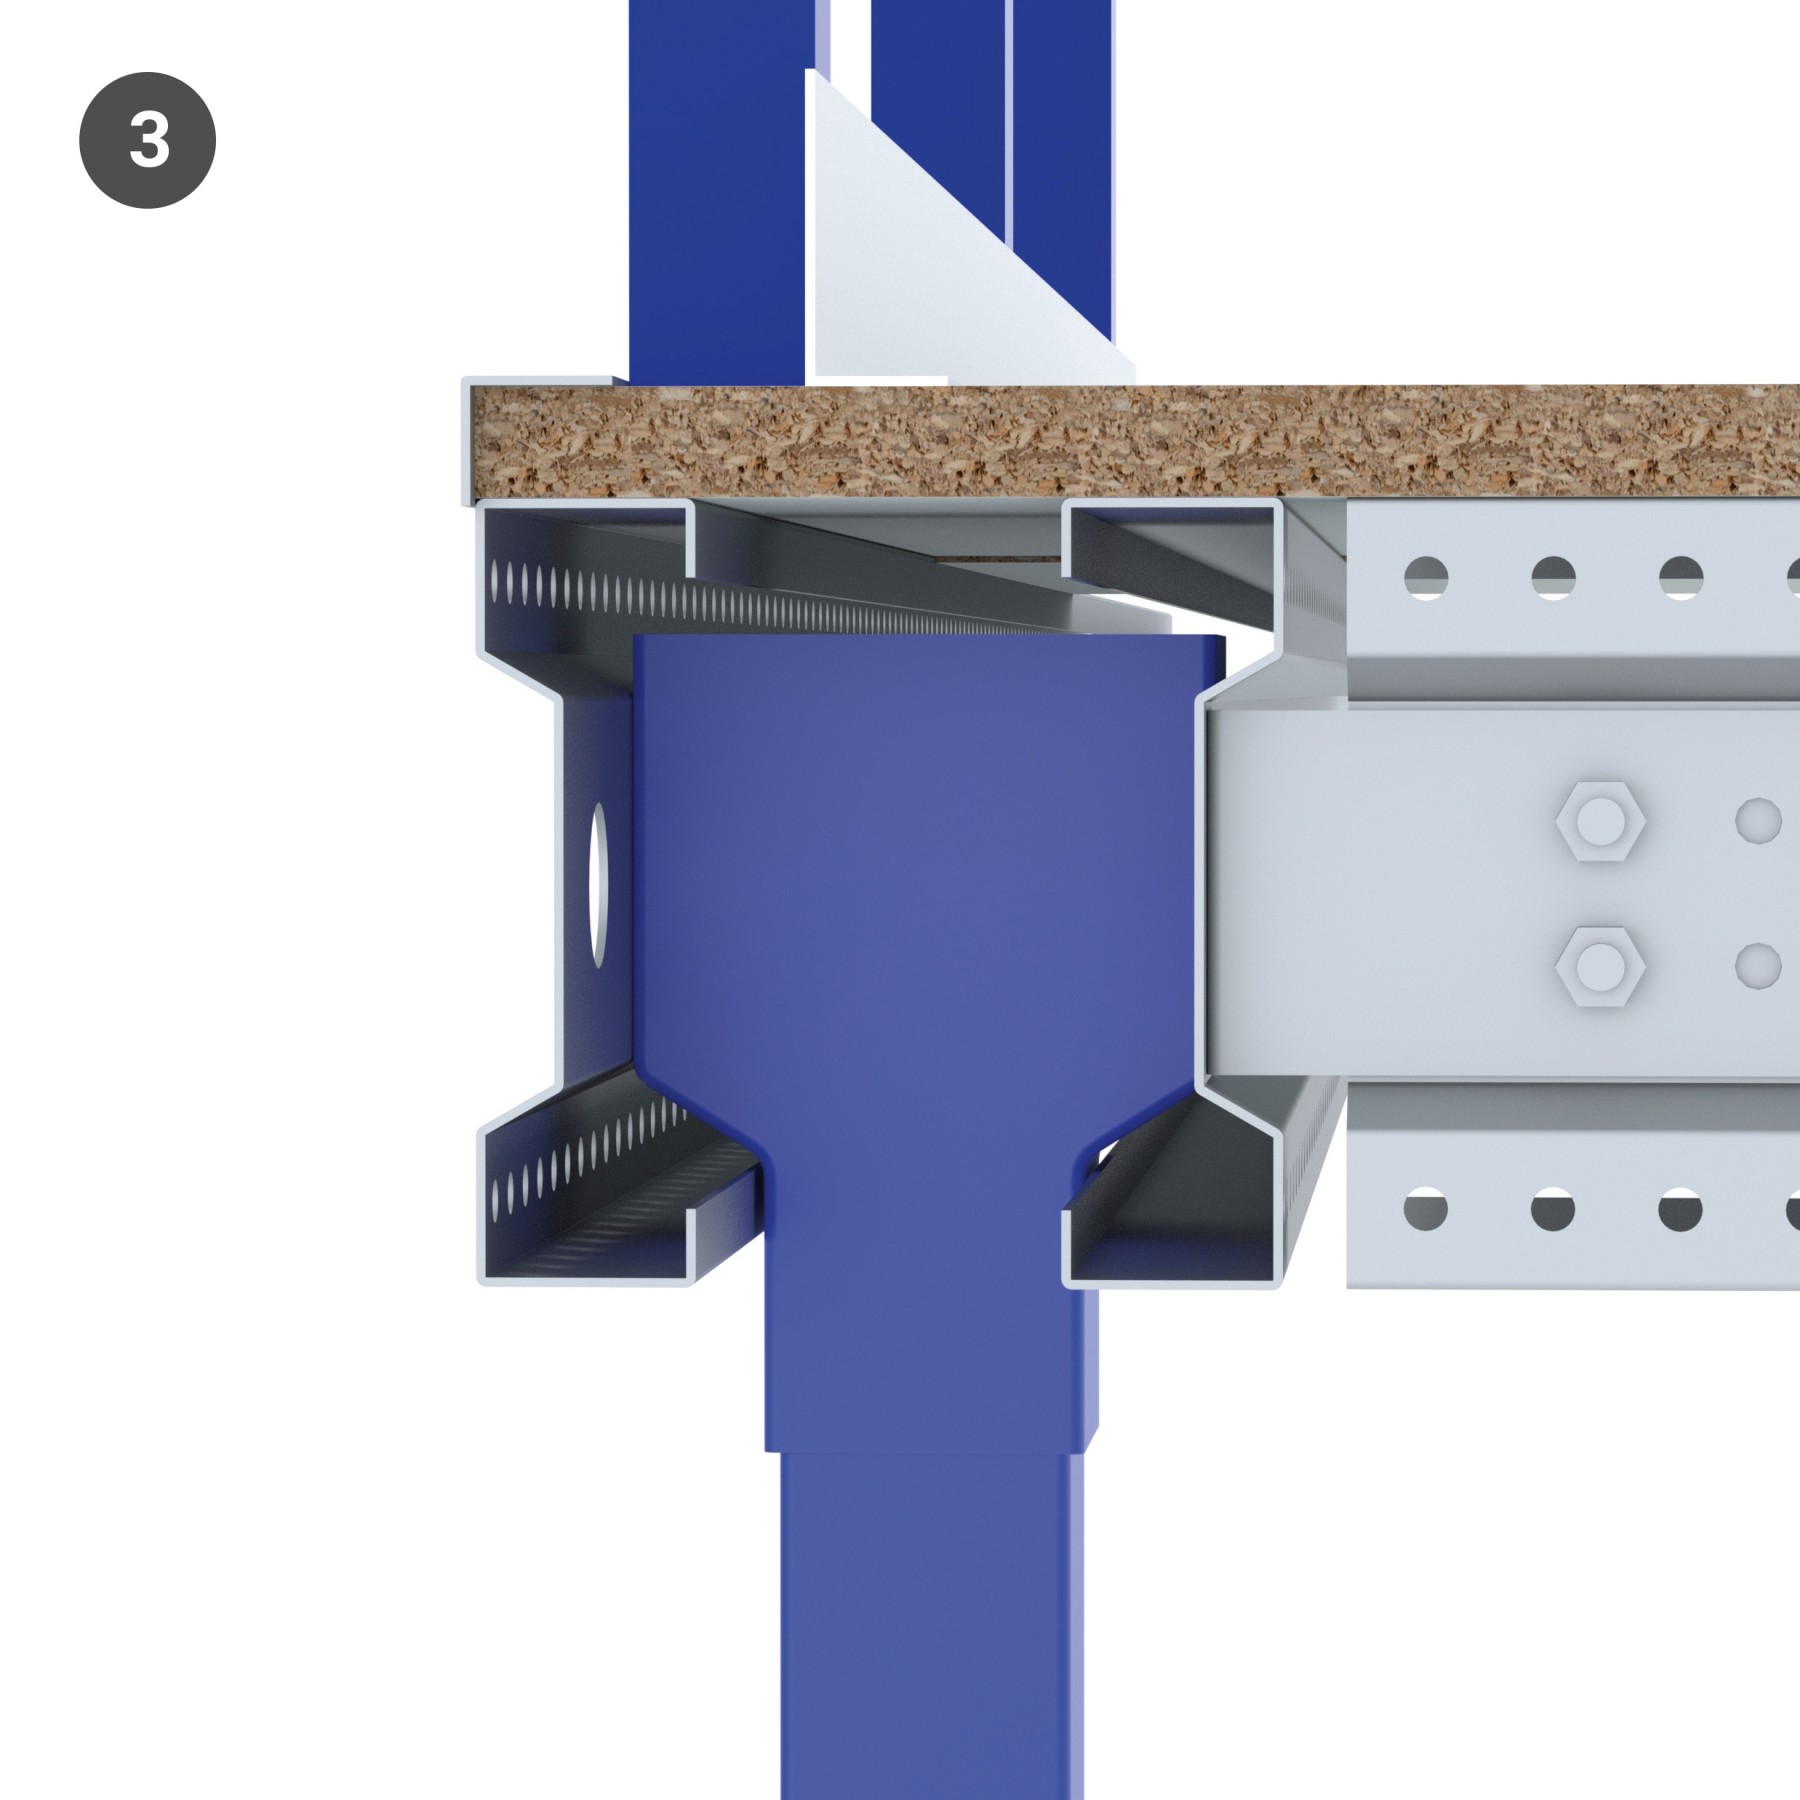
The floor panels are placed perpendicular to the direction of the beams with the joints of the short panel sides staggered between laterally adjacent panels. The short panel side must always be supported by a beam in order to ensure the maximum bearing force of the floor system.
Each floor panel is supported by at least 4 support beams (1) . Reducing the number of support beams can have an impact on the maximum permissible load. This number can be reduced to 3 support points along the edges of the floor surface where cut pieces are used to finish.
The floor panels transfer the load to the secondary beams, which in turn transfer the load to the main beams (2) (3).
.jpg)
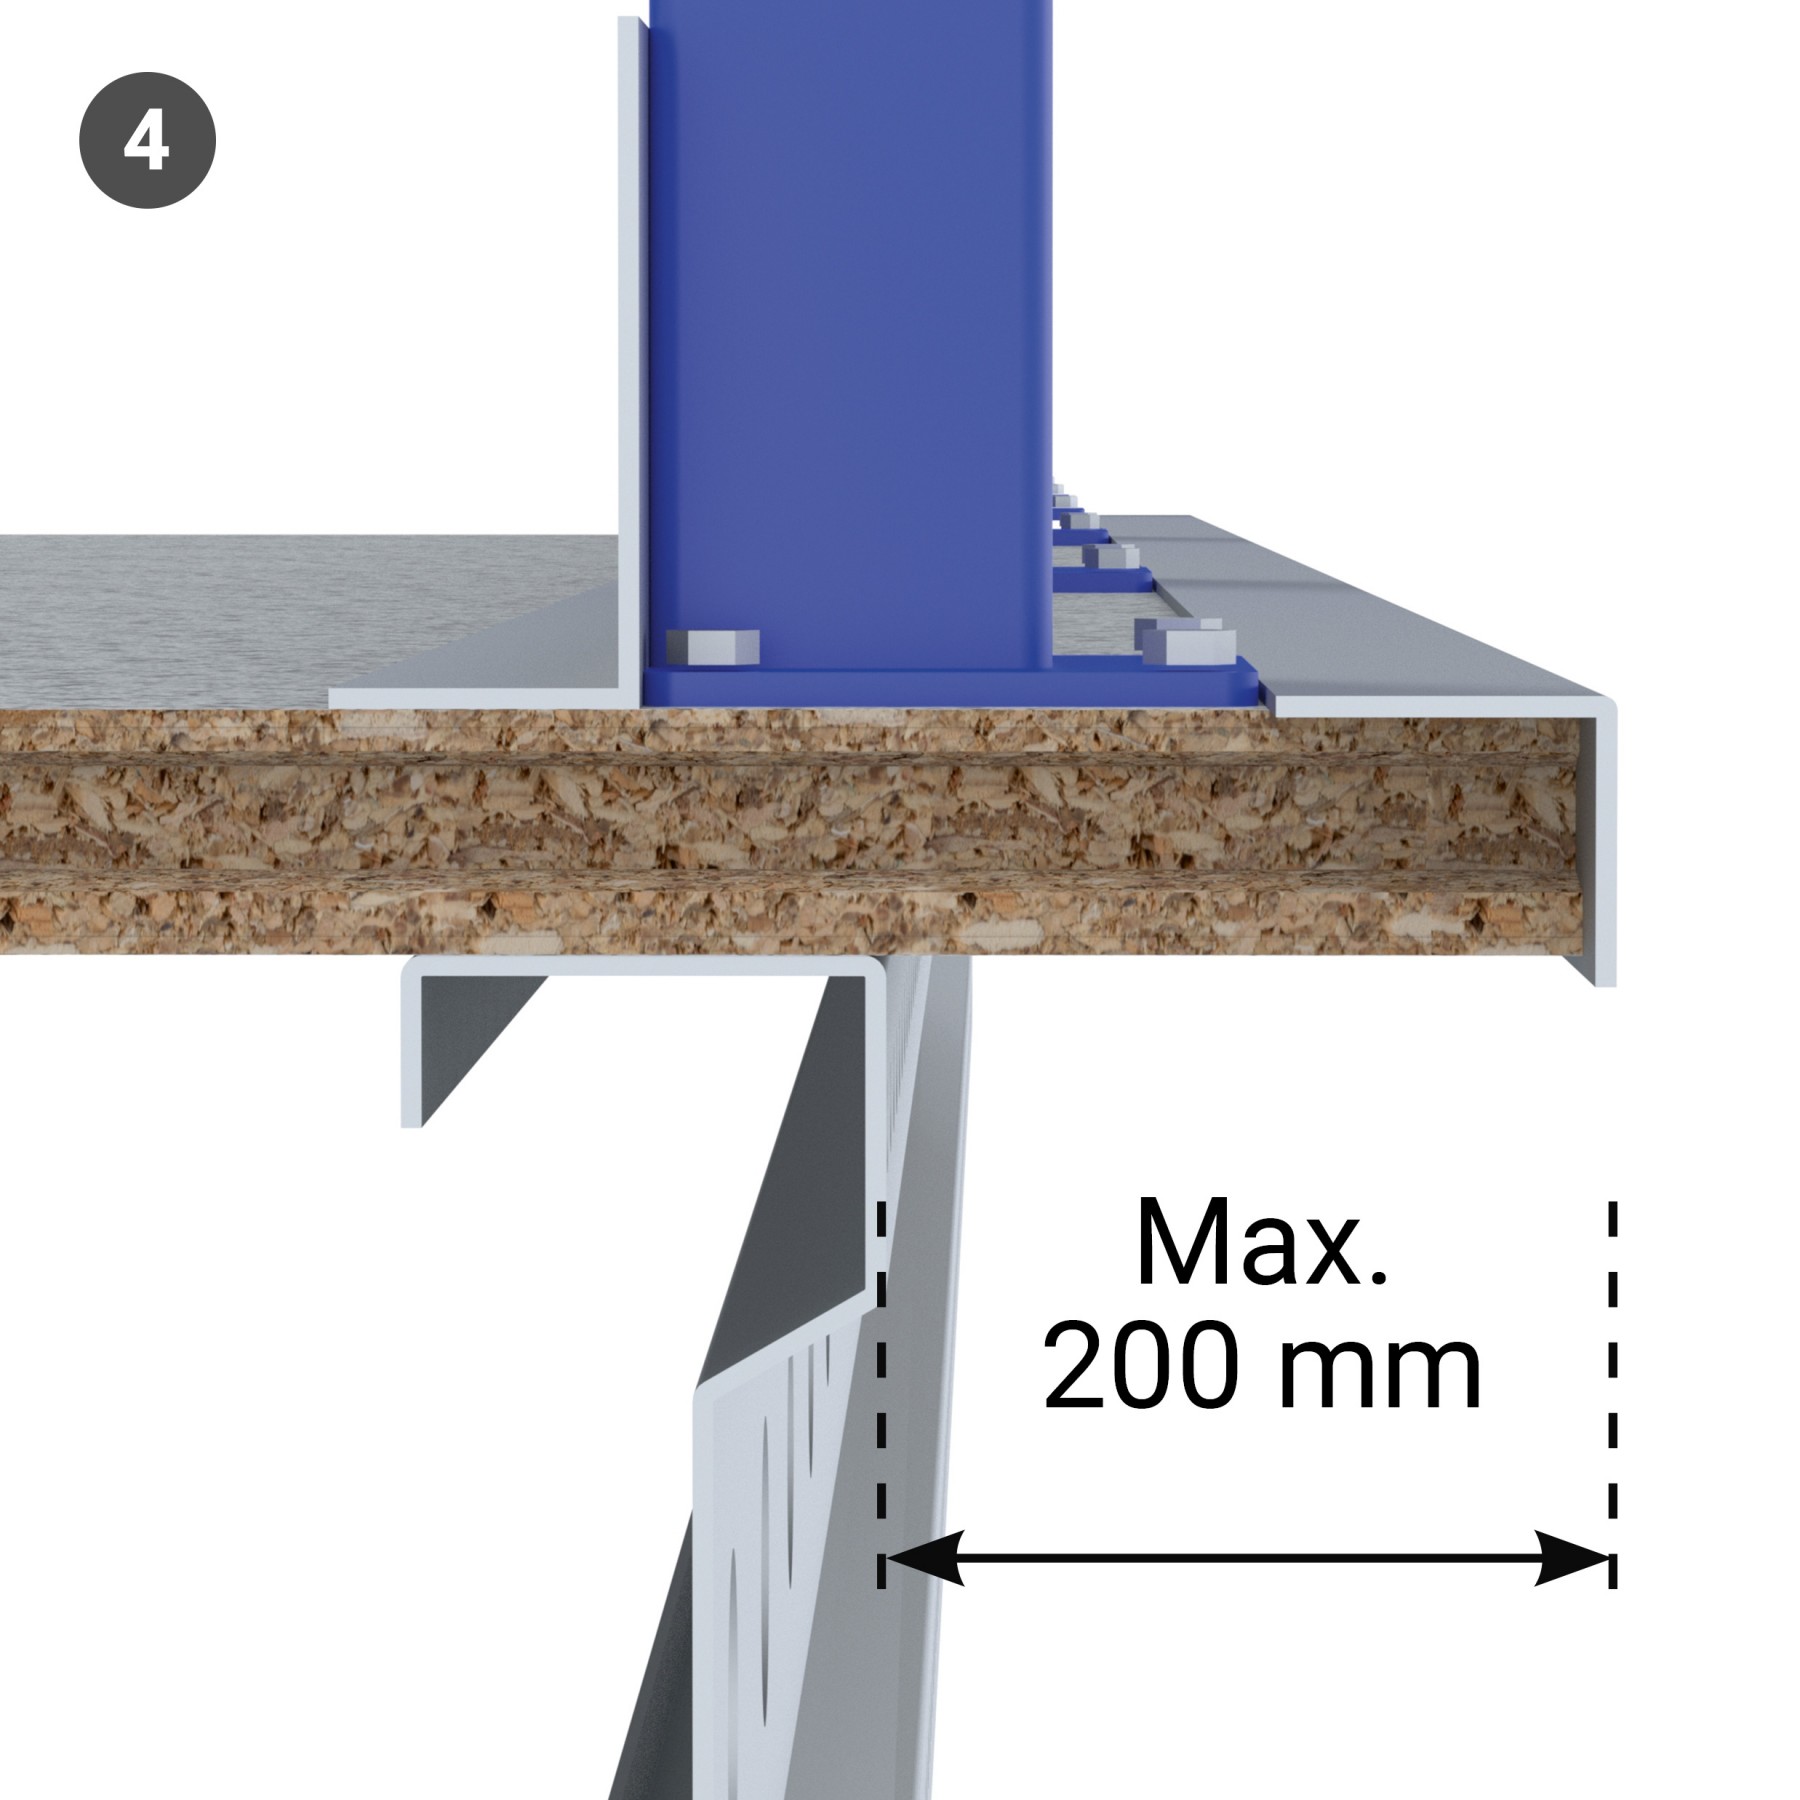
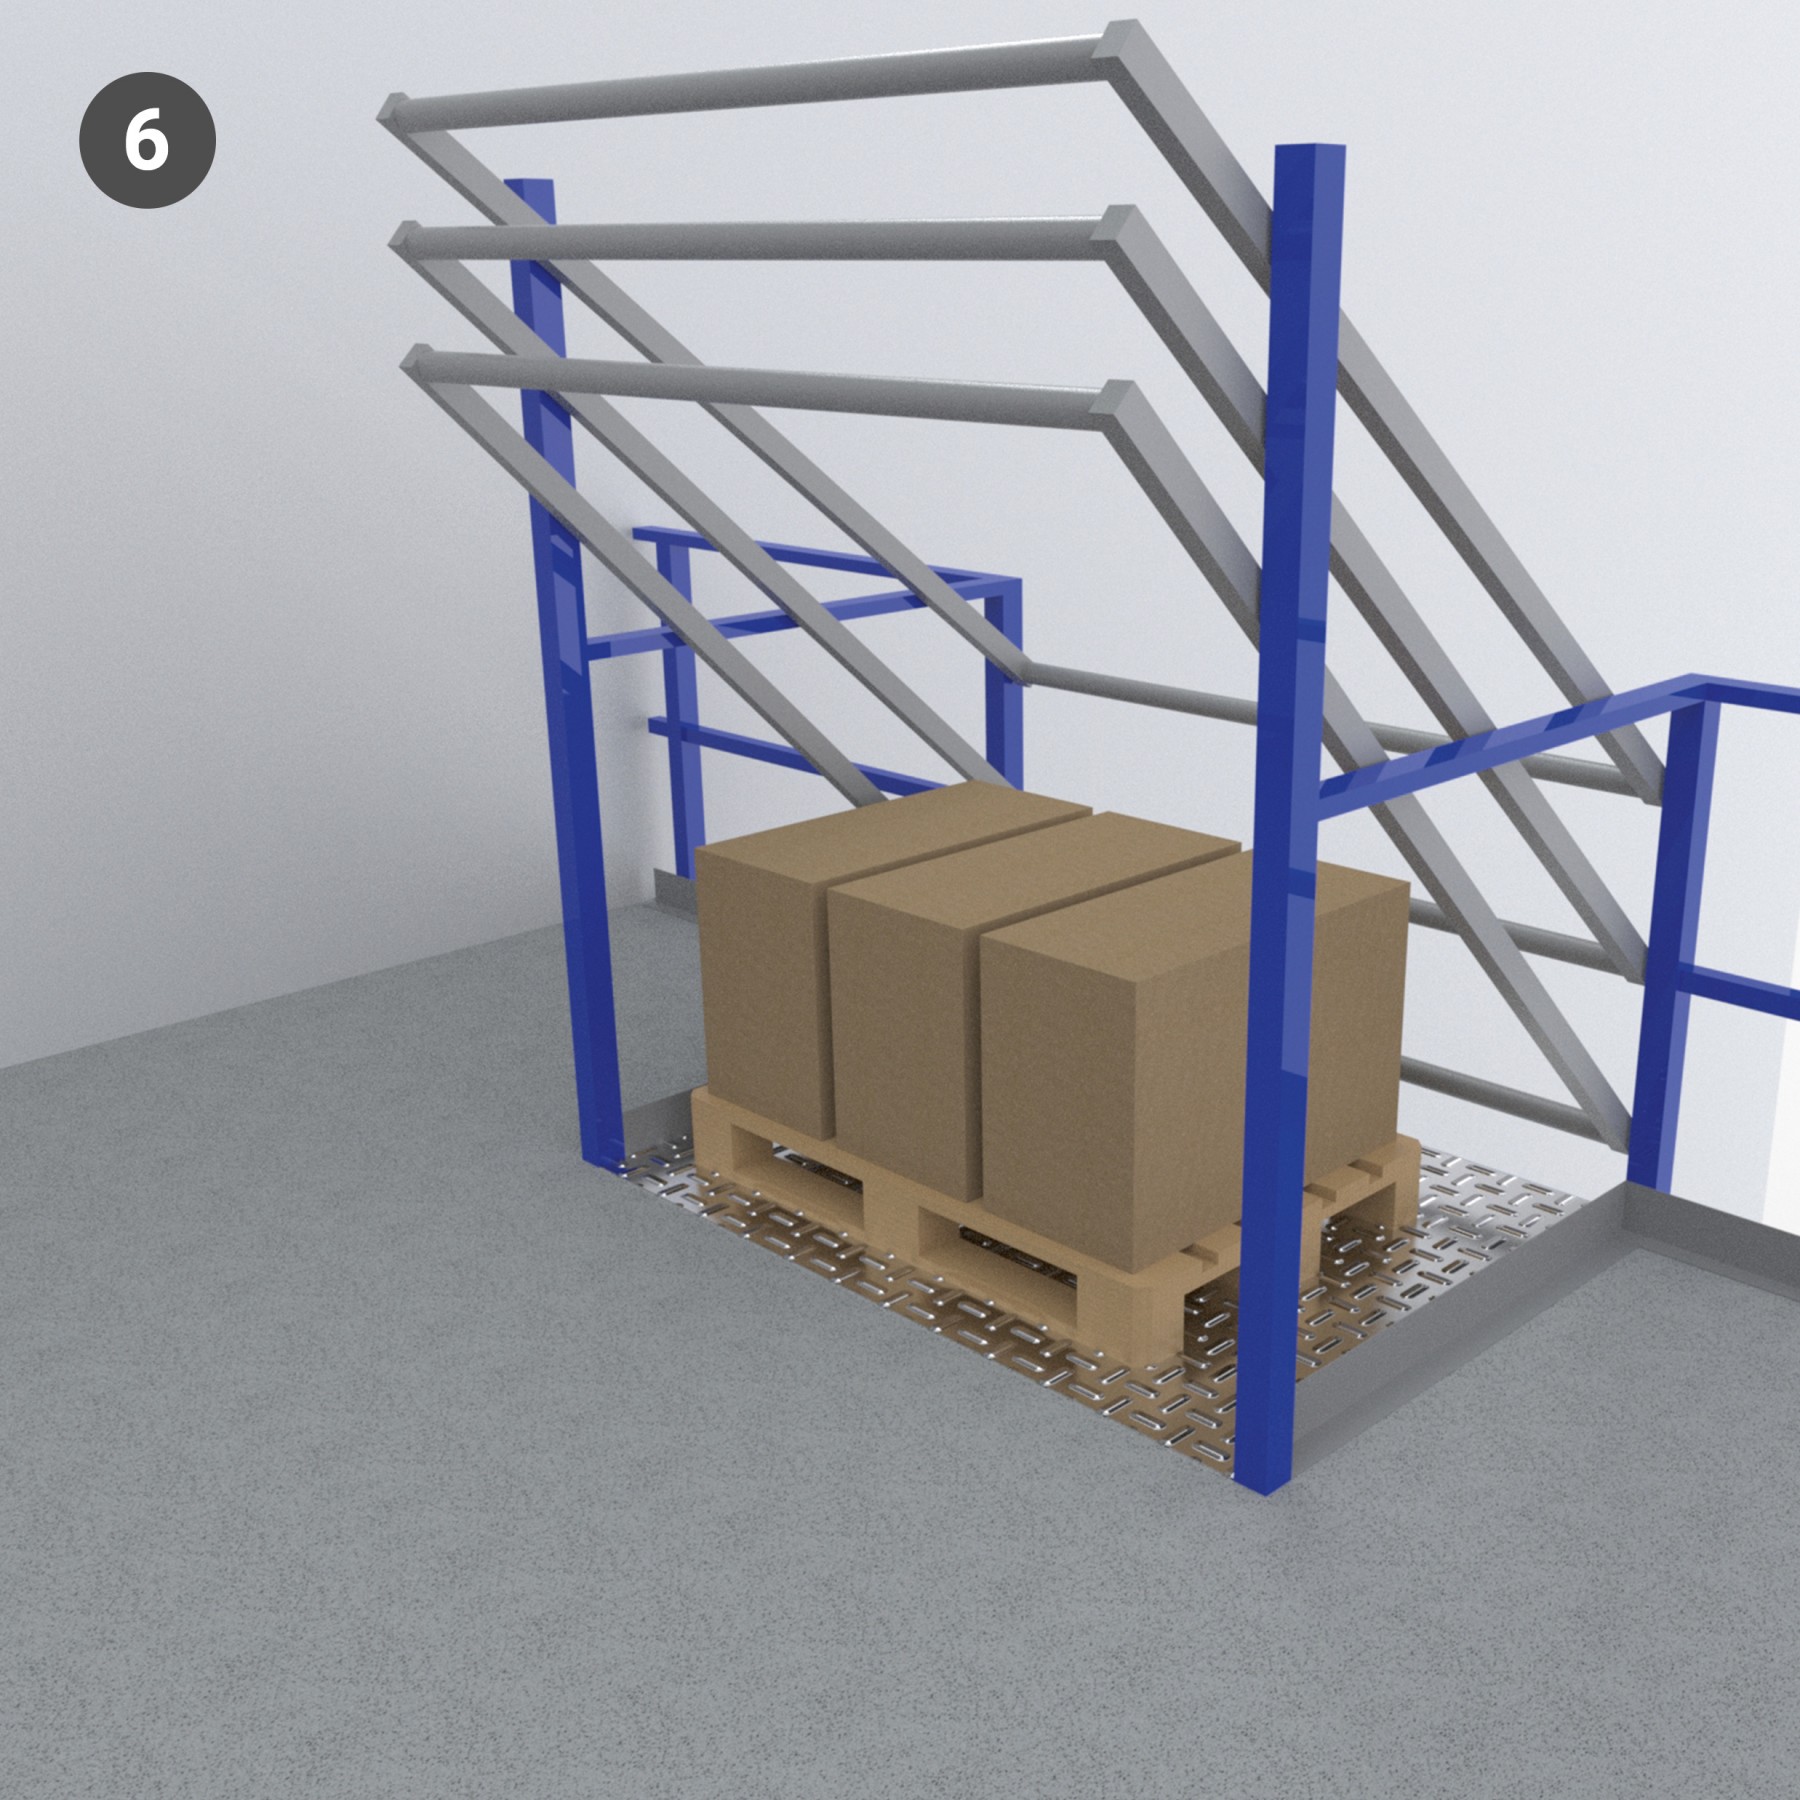
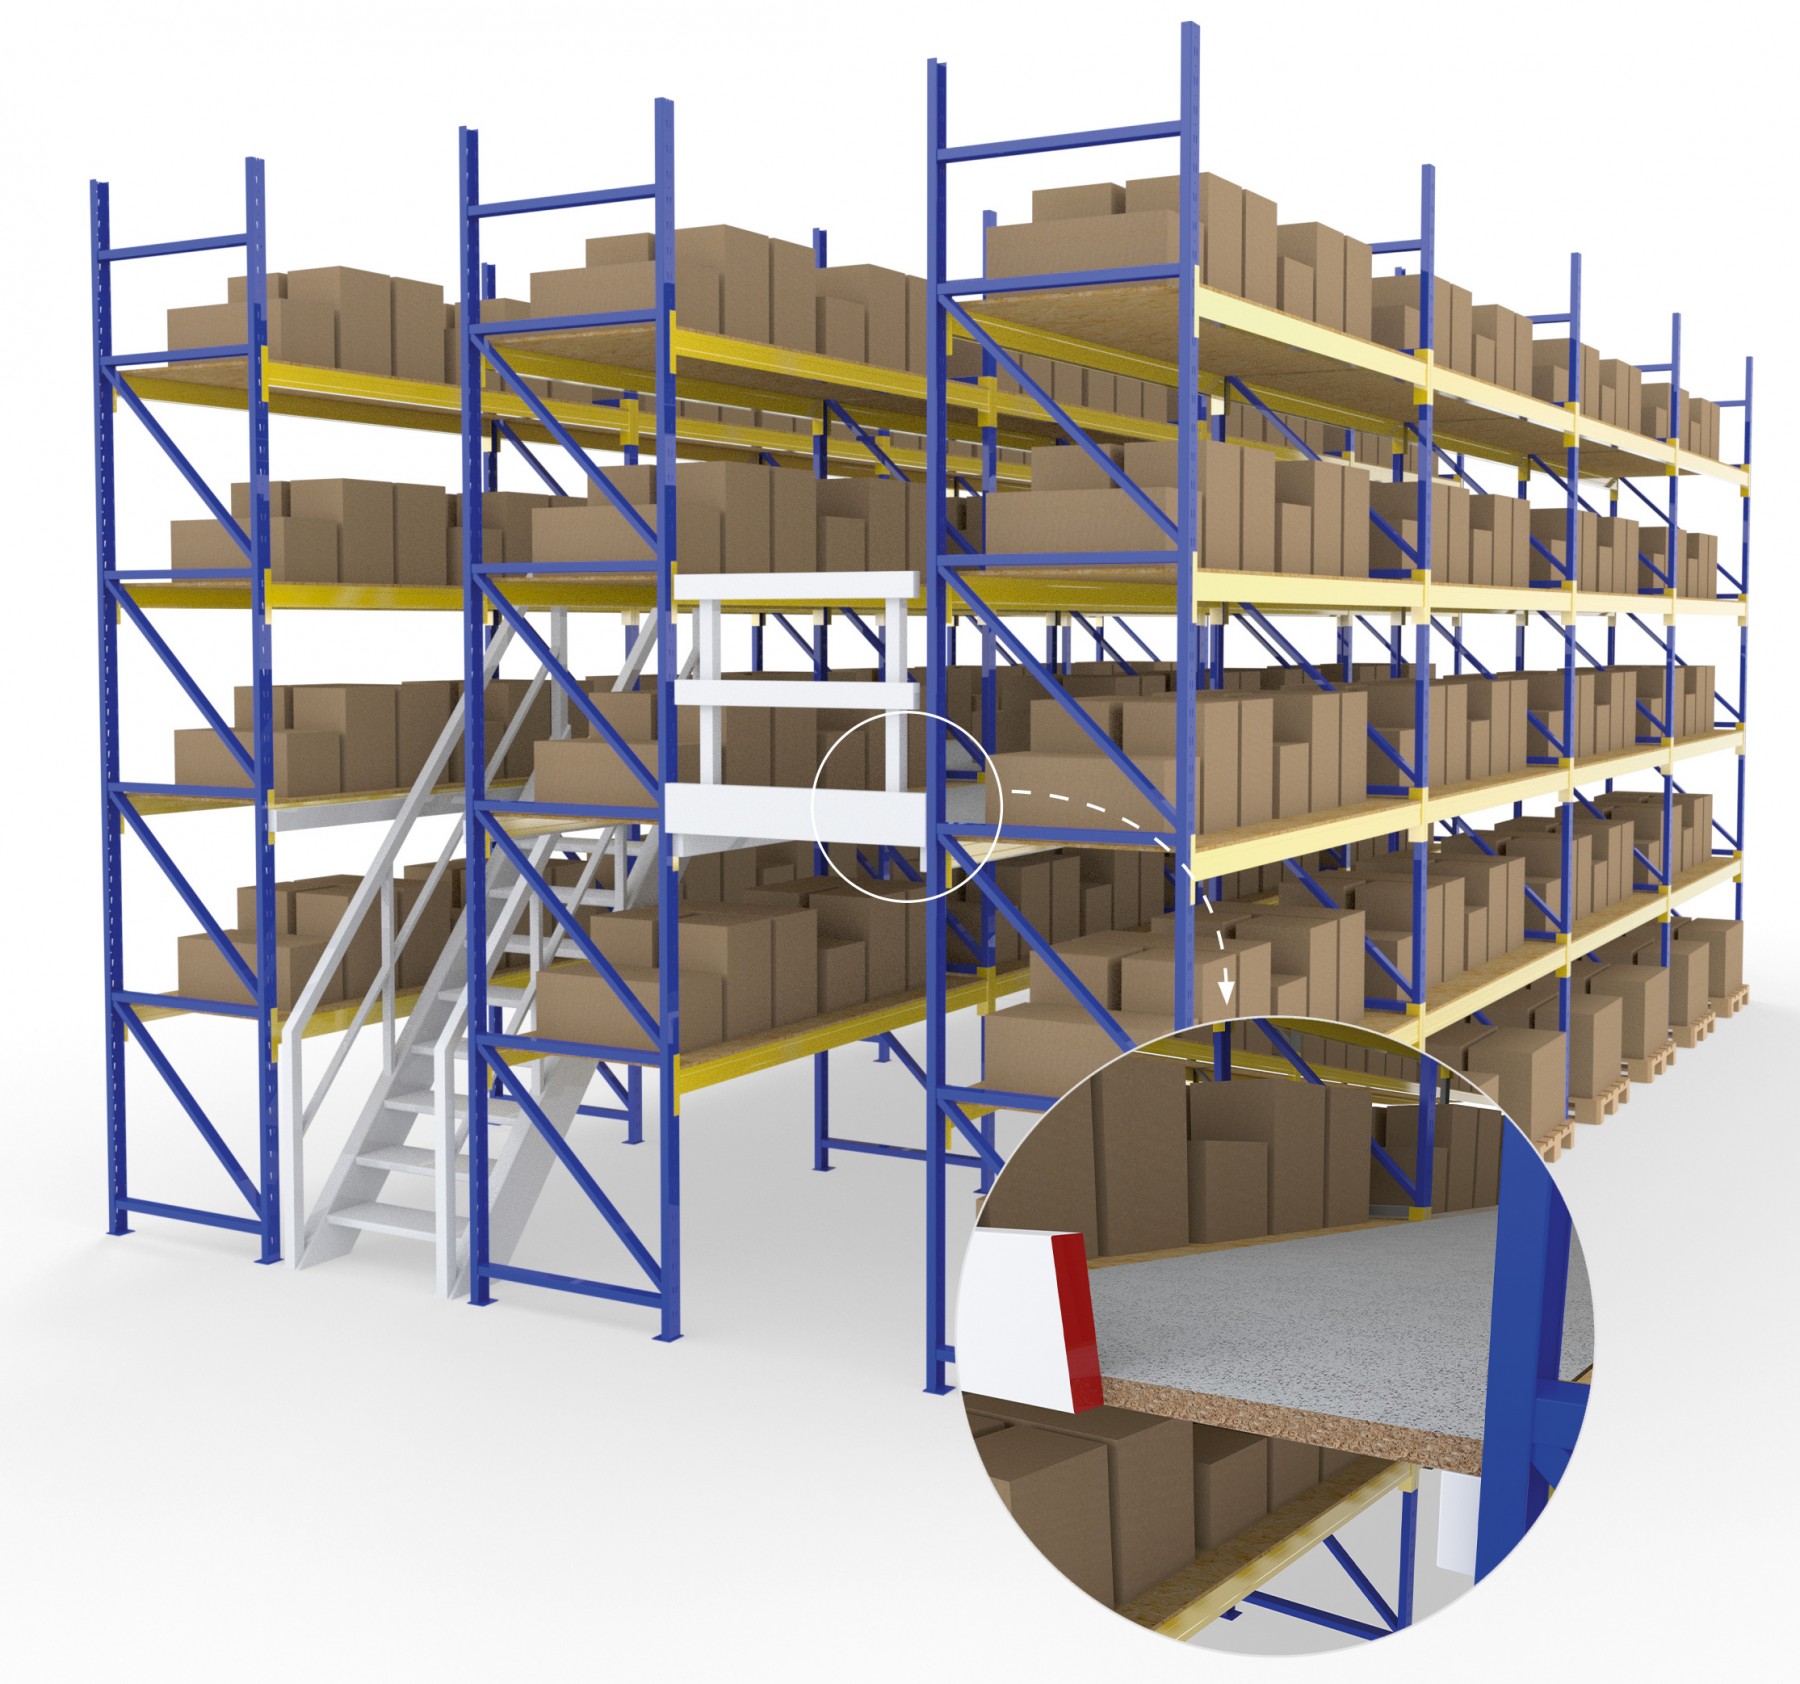
The edge zone of the floor must be supported by the underlying steel structure. Loaded cantilevers are strongly discouraged and may protrude from the bearing structure by a maximum of 200 mm (4).
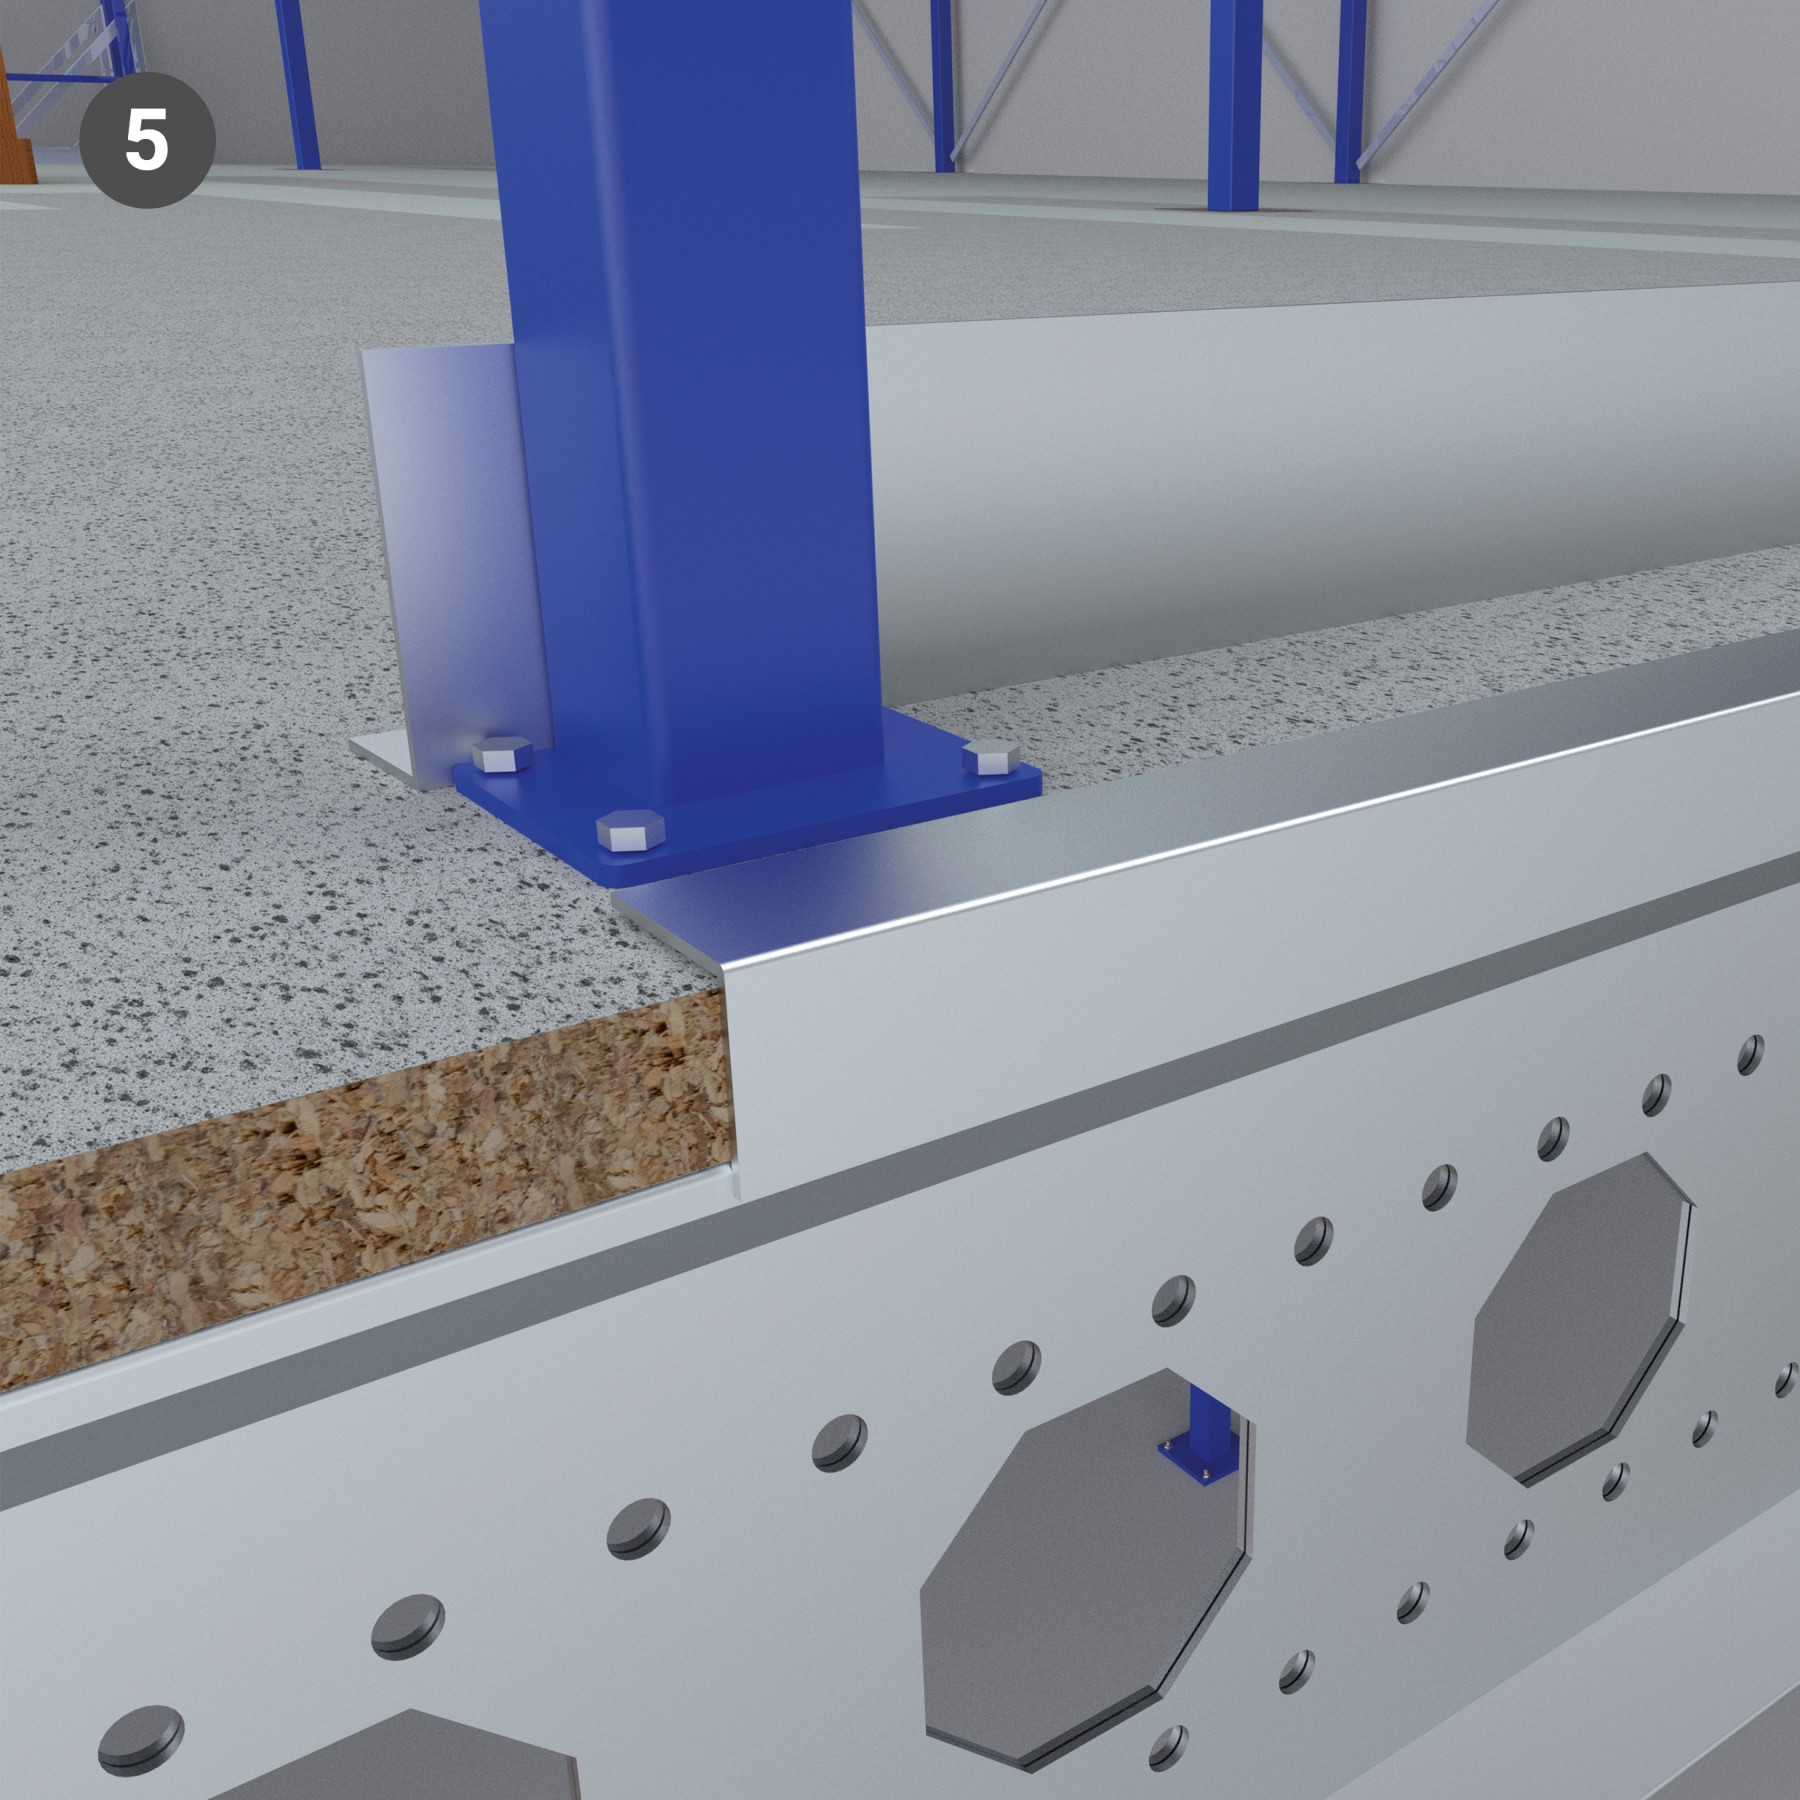
The edges of the floor area are often finished with a bumper and handrail attached to the panels. A metal lip is often installed on the edge around the perimeter of the mezzanine floor surface (5).
In heavily used areas like loading zones or high traffic zones, the Mezzanine floor panel may be protected with, for example, a diamond plate (6).
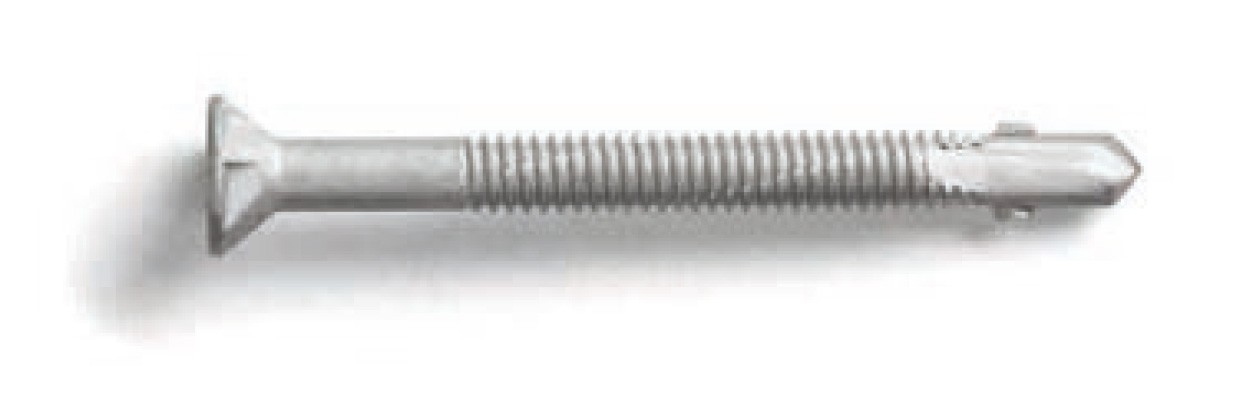
Screws
The Mezzanine floor panels are attached to the metal structure with screws. The fastener that is most suitable for your project should be determined in consultation with the engineering office and the producer of the fastener.
The following parameters may play a role in selecting the correct screw:

Example screws: Wurth - ZEBRA wing pias BS Diameter: 6.3 mm Length: 70 mm
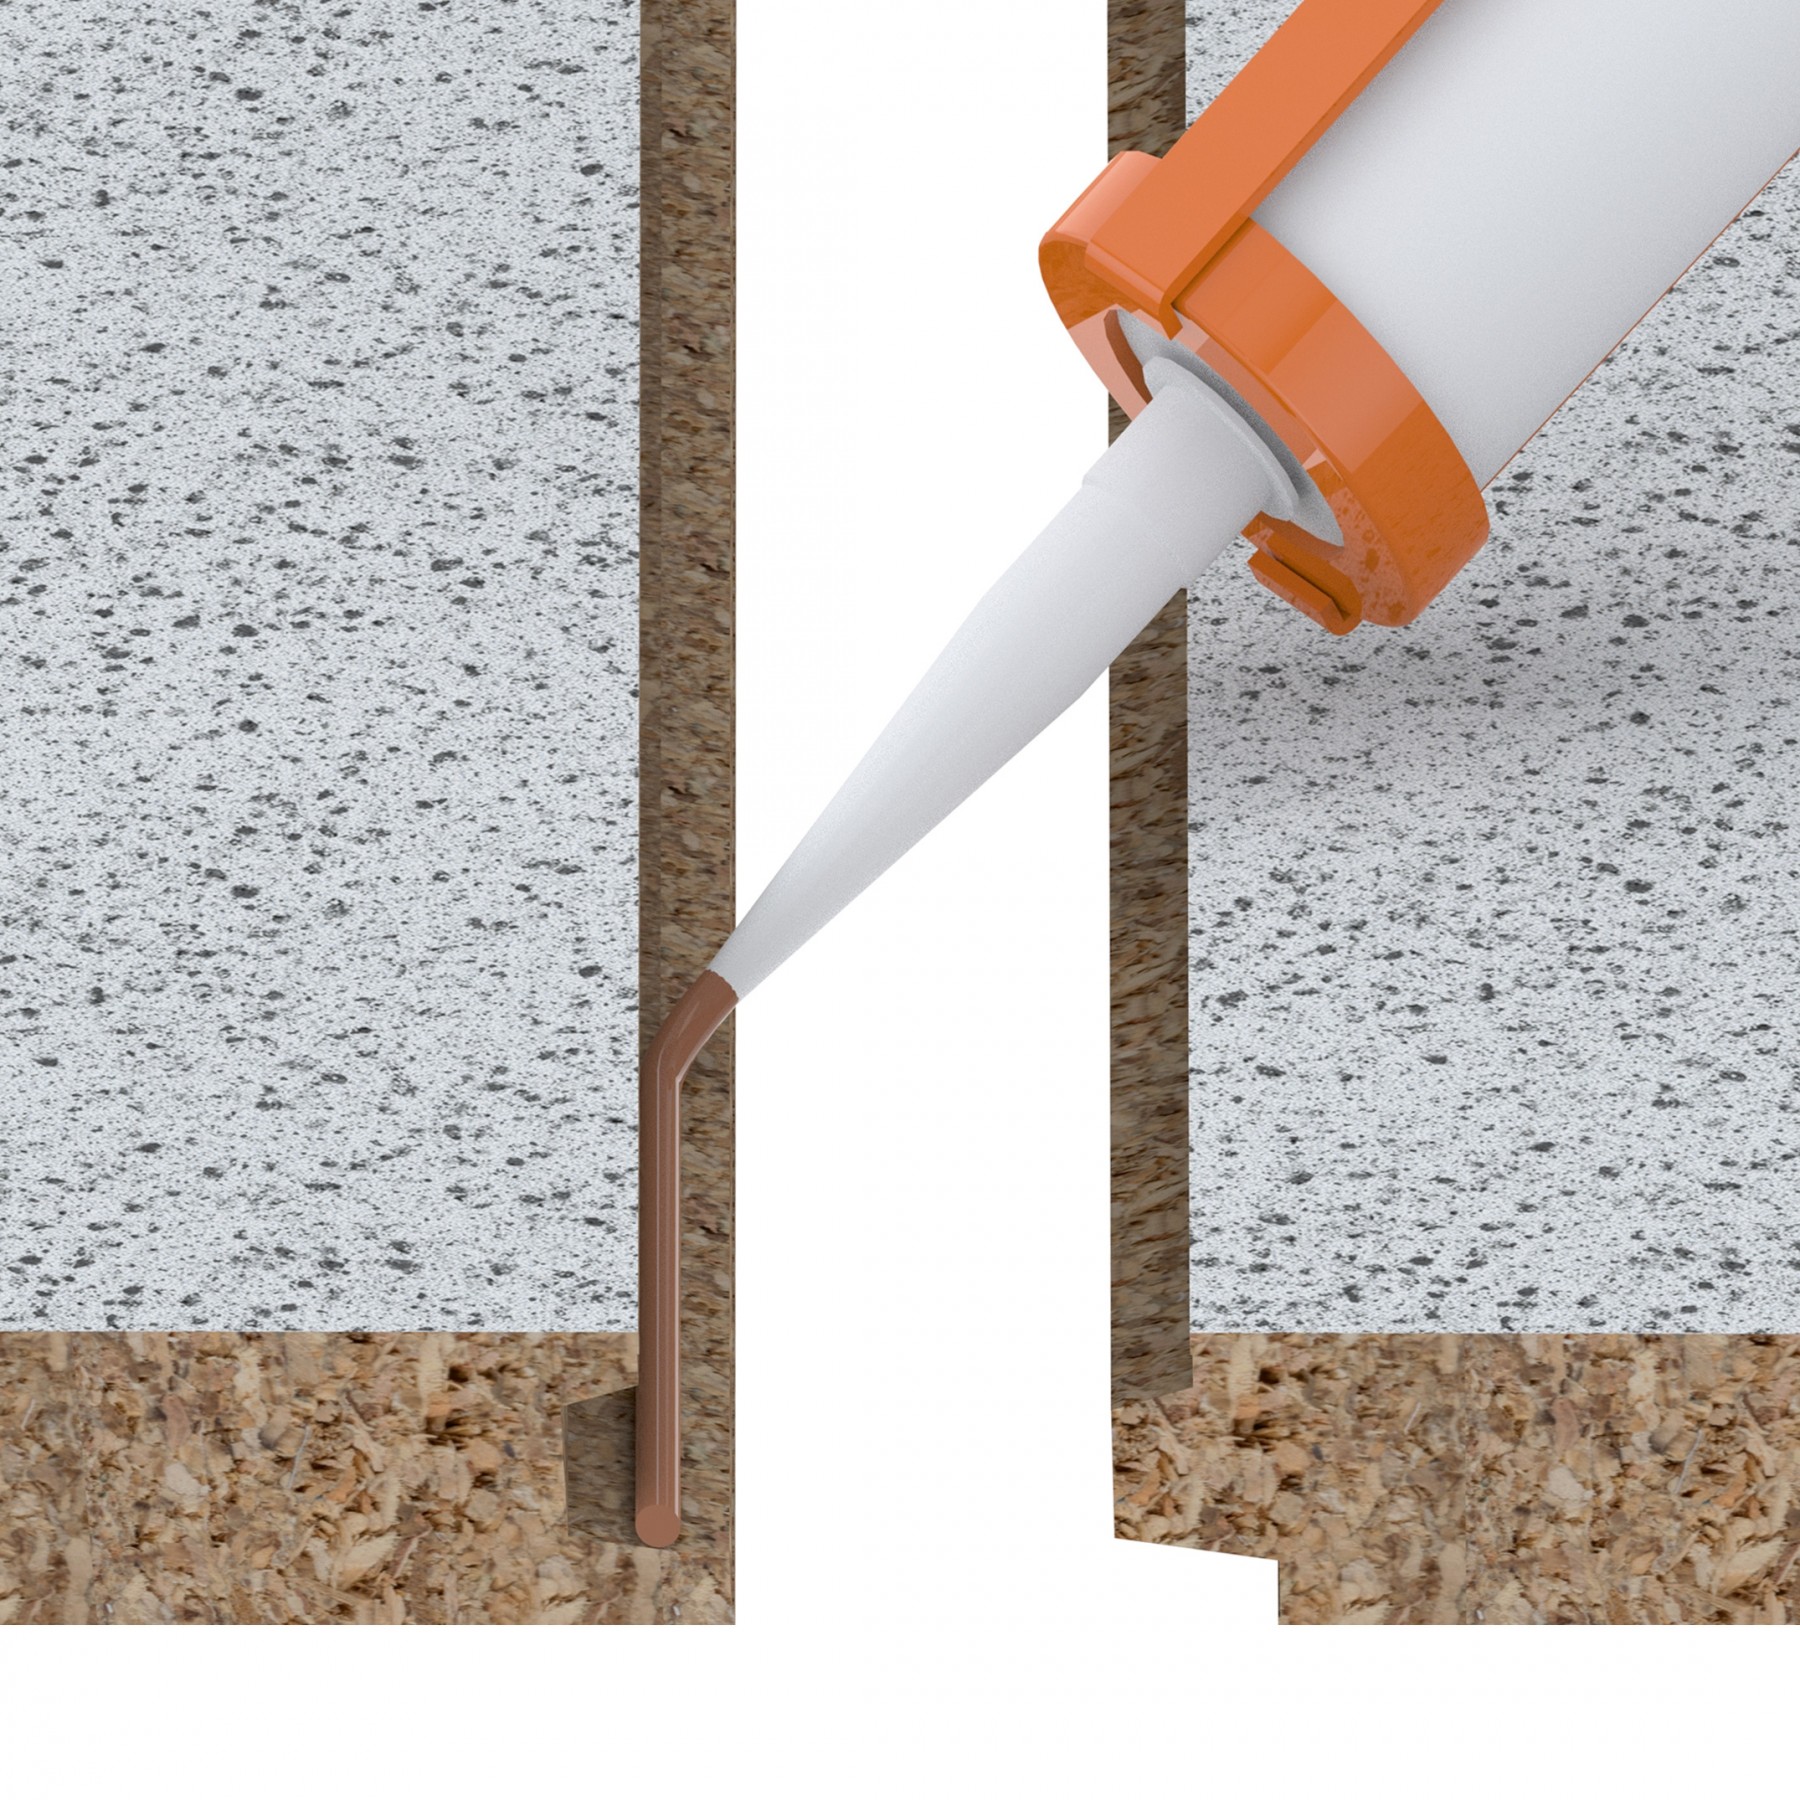
Tongue and groove adhesive
We recommend using adhesive in the tongue and groove joint. This helps to increase the overall resistance of the floor and to limit vibration and cracking as a result of expansion. In addition, an adhesive joint can help to minimise stepping if the substructure is uneven. The most suitable adhesives are PVAc adhesive (type D4, waterproof white wood glue) or PU adhesive.
Example adhesive: Wurth RAPID PUR CONSTRUCT FIX.
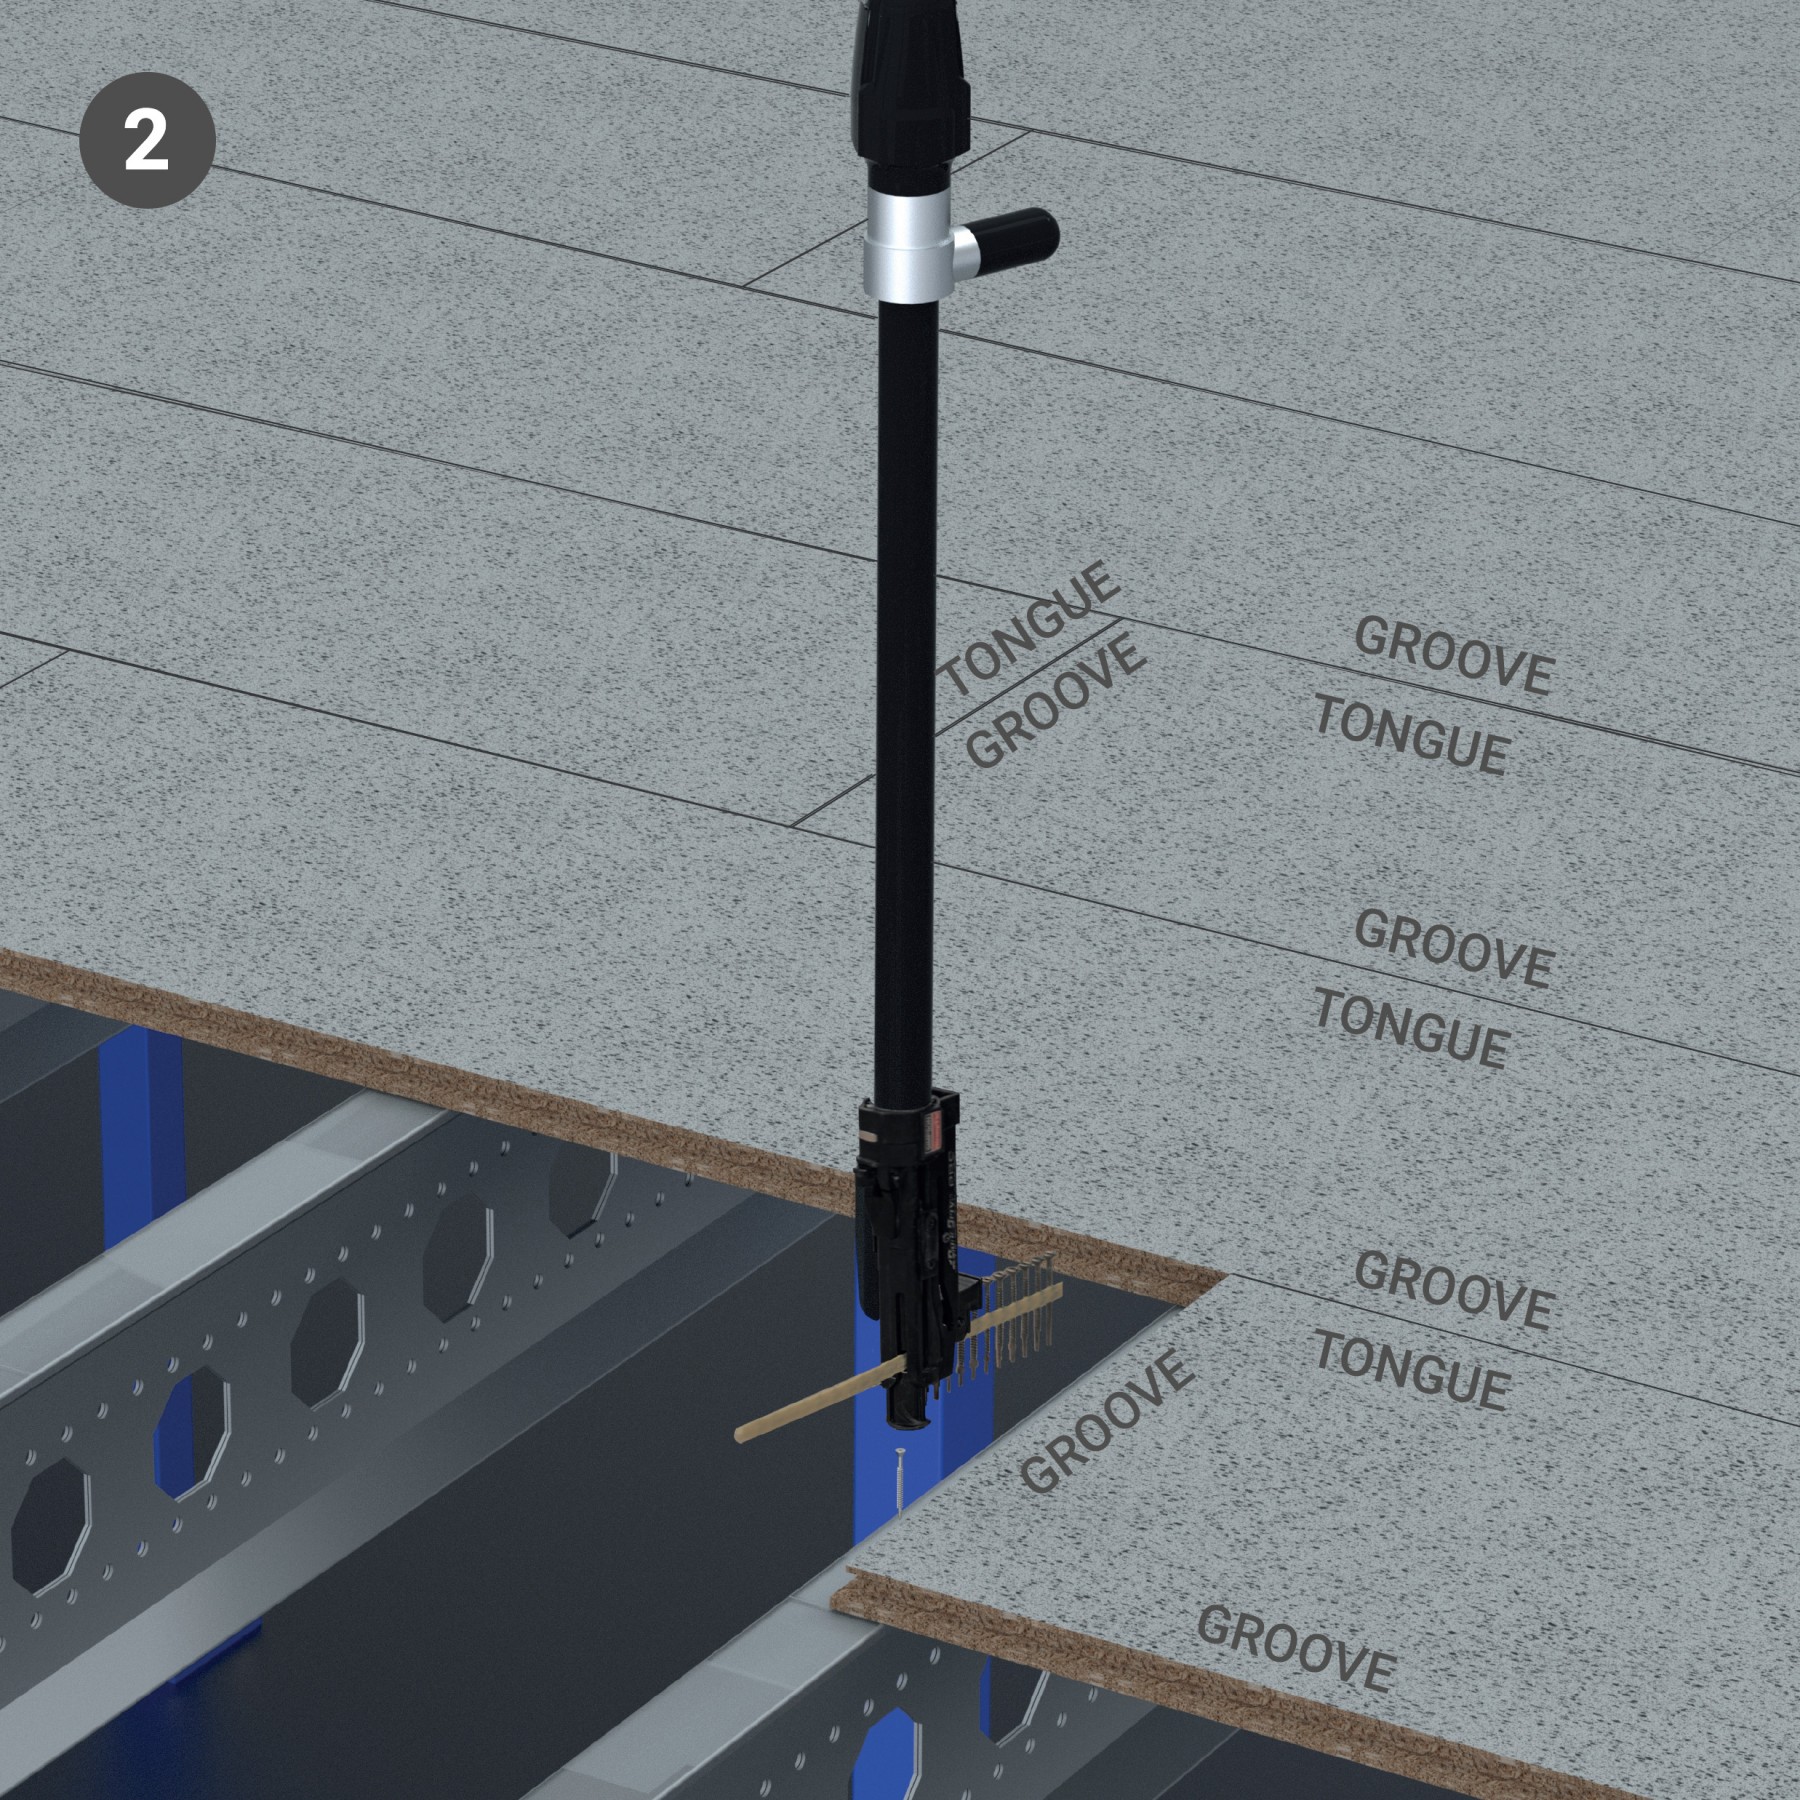
The panels are slid together during installation. If attachments are being used, take care not to use anything that could damage the surface finish or tongue and groove joints.
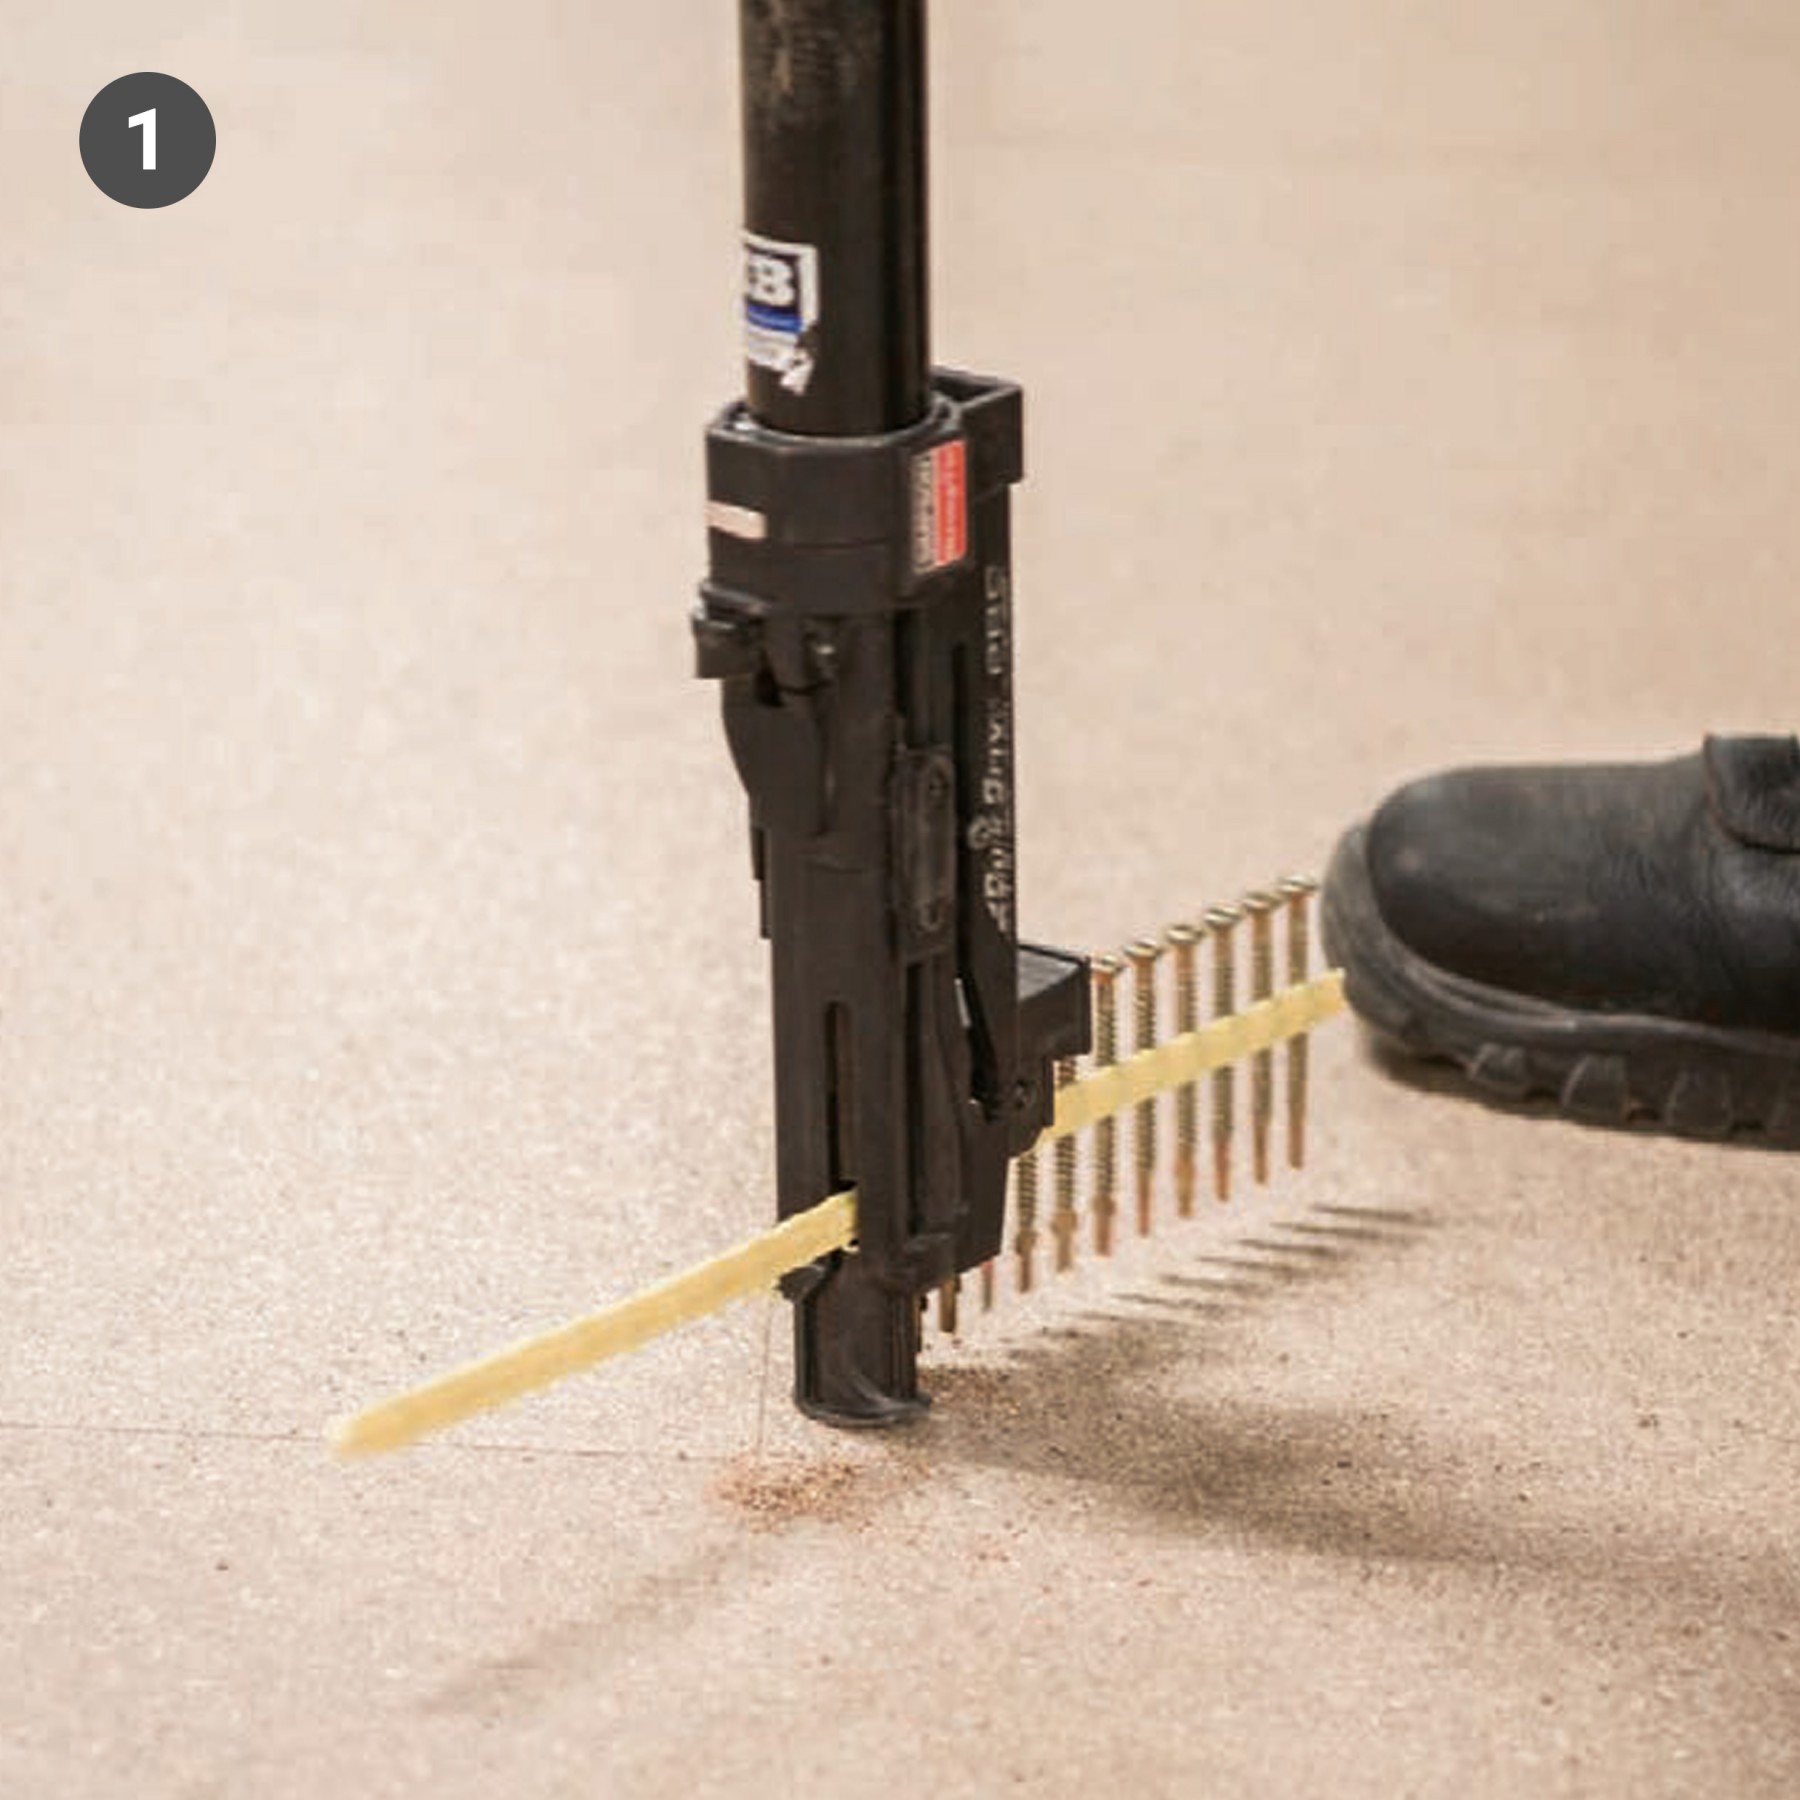
Mezzanine floor panels are typically attached to the substructure from above (1) (2). If you do not wish to puncture the surface, you can attach the panels from the bottom side with the support beams and floor panel pre-drilled before screwing.
The screws must be countersunk to prevent damage.
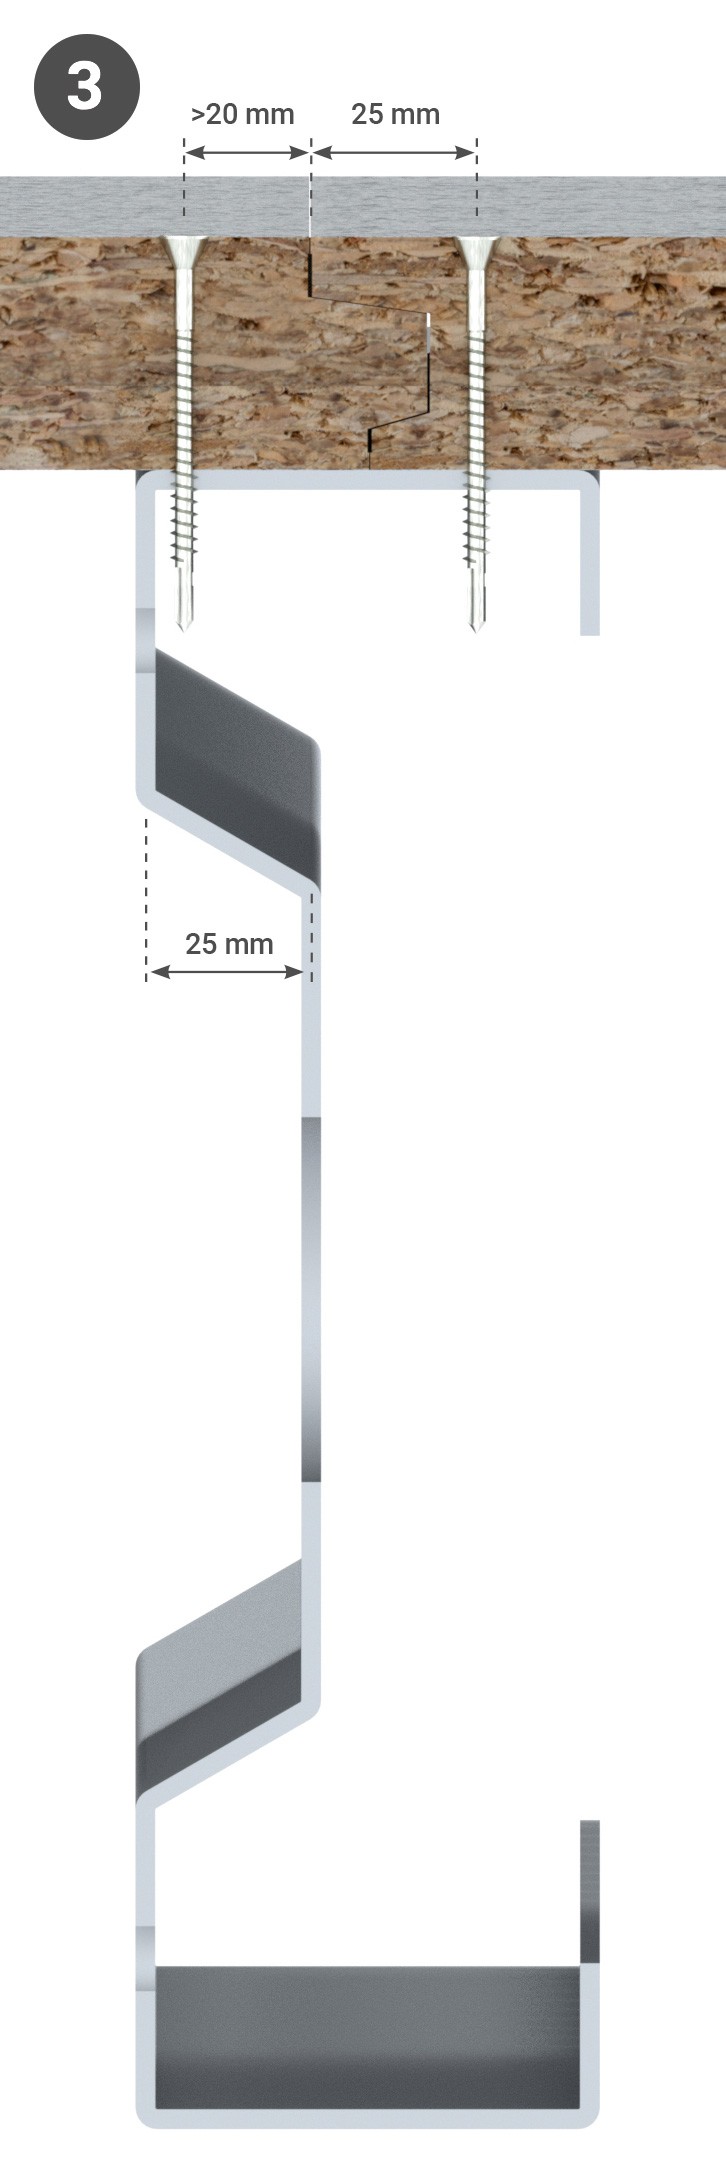
The screws are placed a minimum of 20 mm from the tongue edge and 25 mm from the groove edge (3) and with a straight edge, a minimum of 15 mm. The tongue and groove joint should ideally lie flat above the web of the beam. In the event that the joint edges too far towards the open side, the flange of the beam will deflect more quickly in the event of a load on the grooved edge, which will cause stepping more quickly.
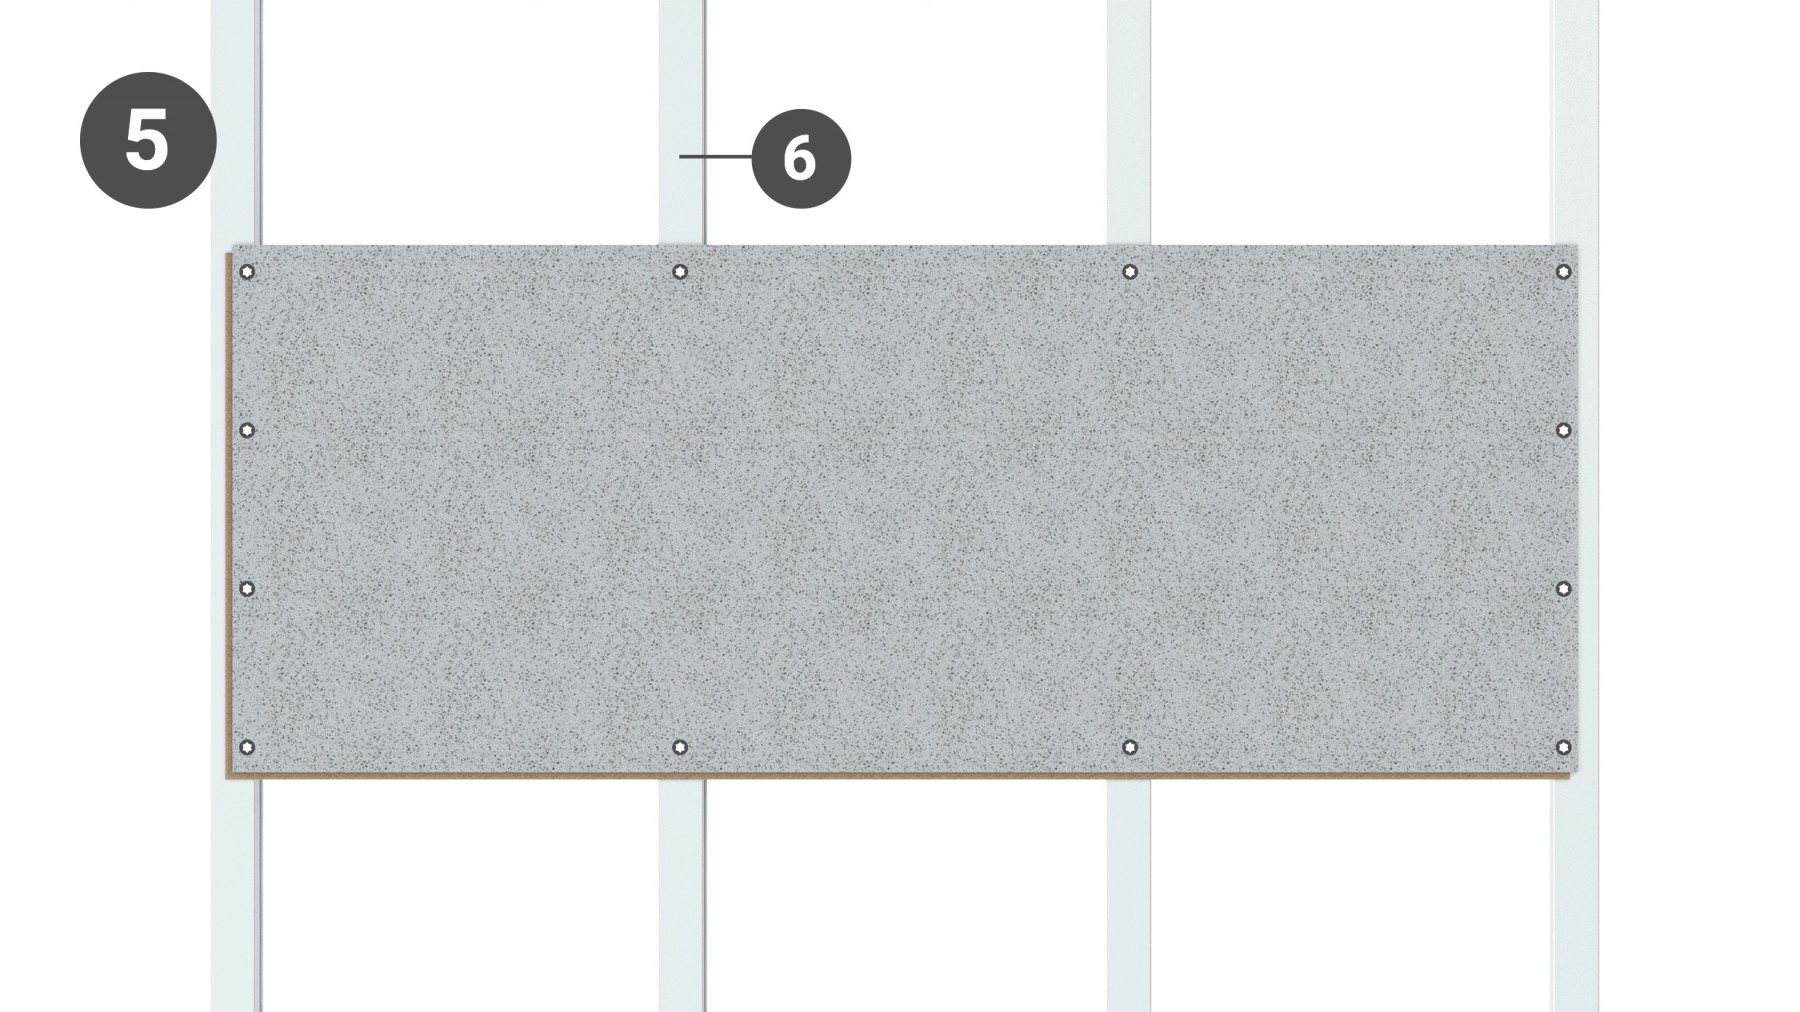
For panel widths of 600 mm and 850 mm, a minimum of 3 attachment points is recommended per cross beam (4) and a minimum of 4 attachment points for a panel width of 1000 mm (5).
The number of attachment points can be reduced for intermediate crossbeams (6).
(4) Screw pattern for panel widths of 600 mm and 850 mm
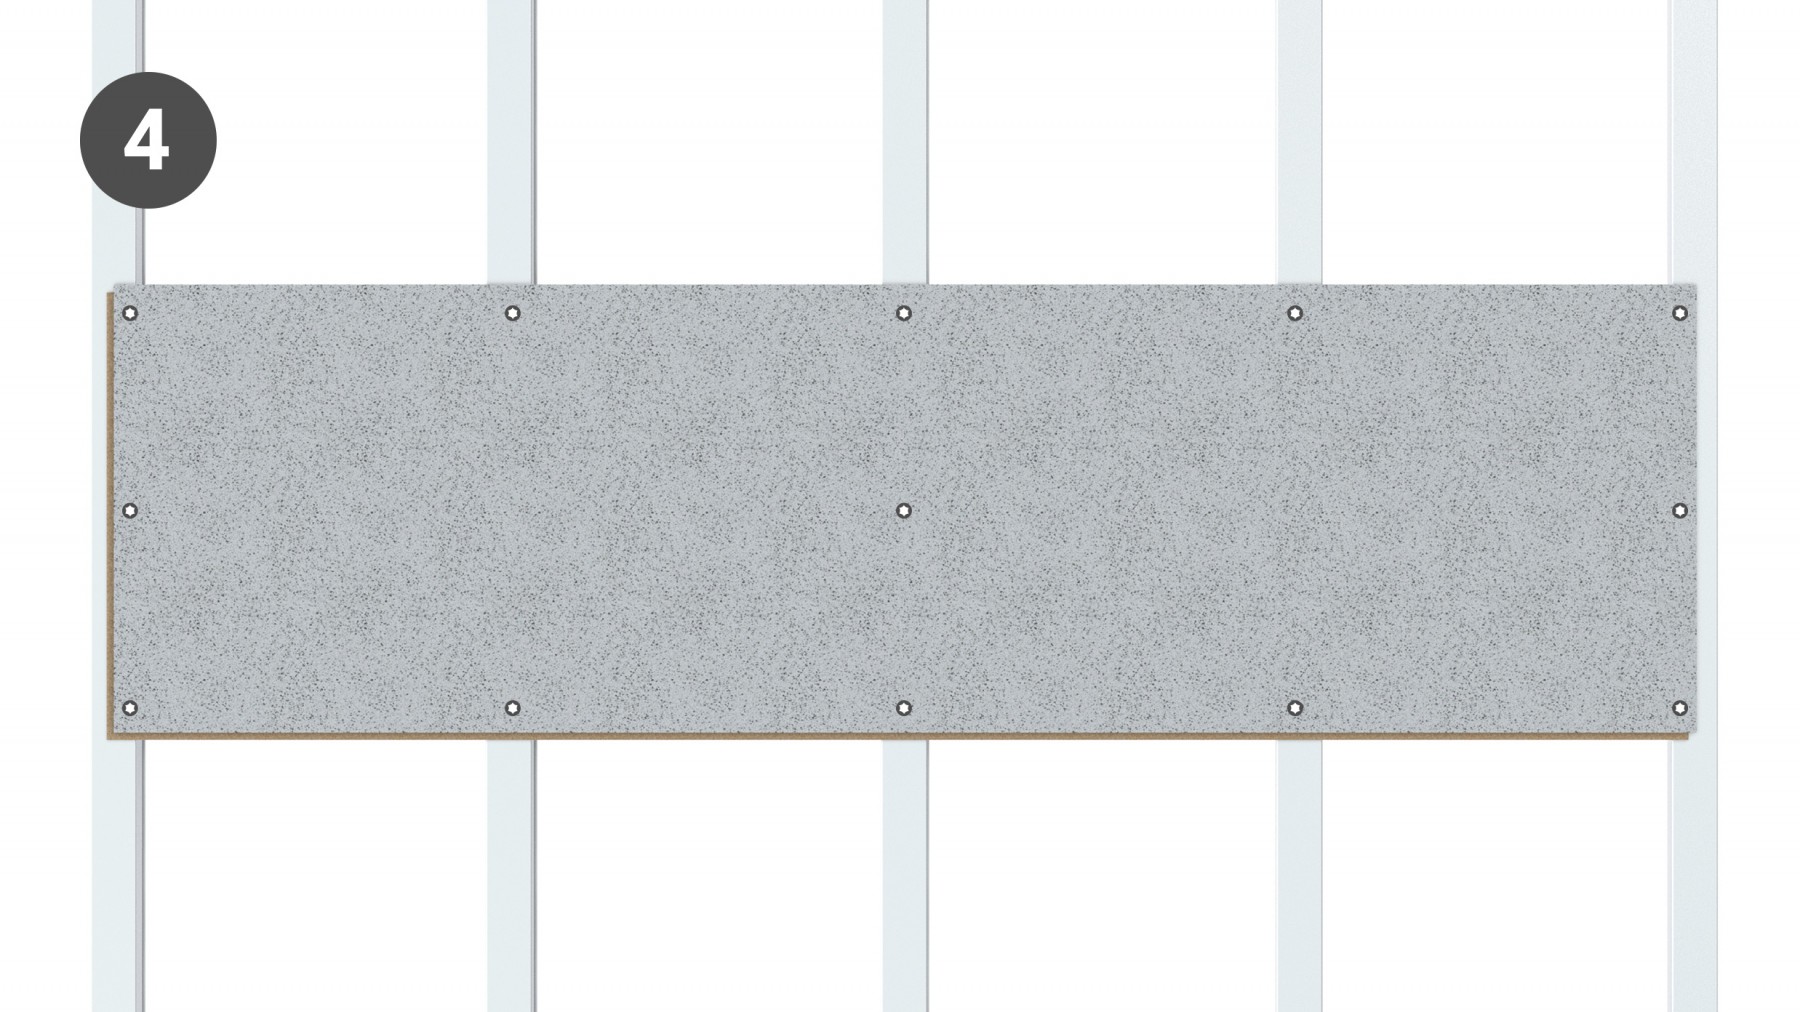
(5) Screw pattern for panel width of 1,000 mm
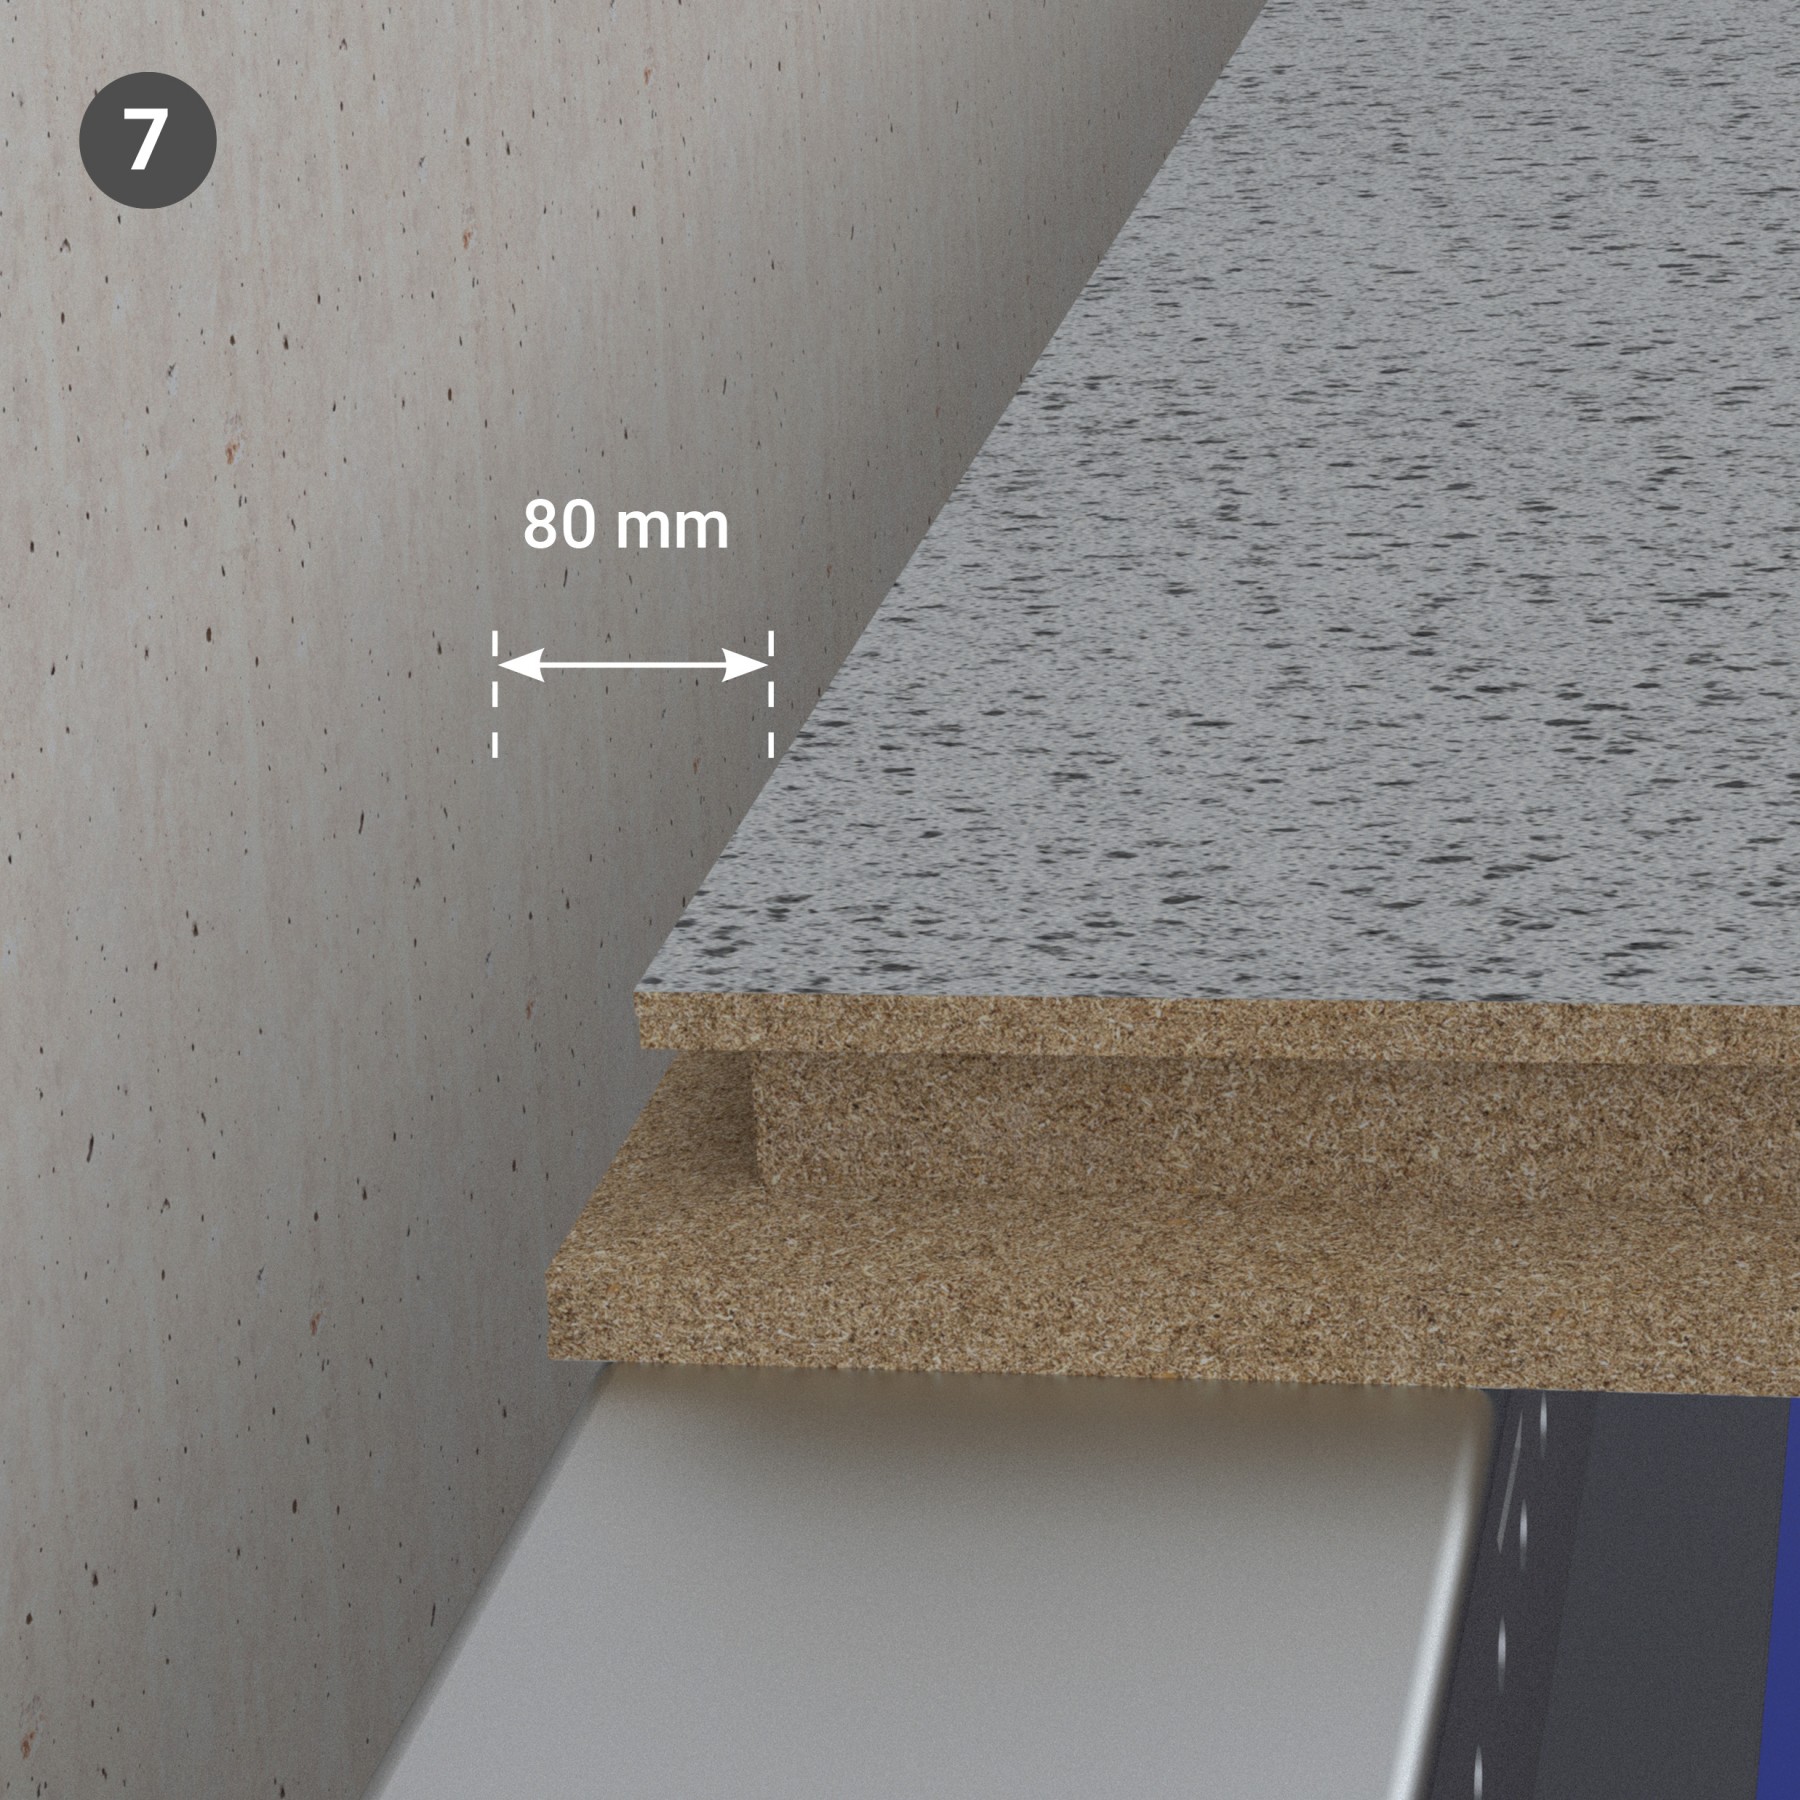
Wooden floor panels may expand or shrink in changing temperatures and humidity. This dimensional change can be absorbed by expansion joints.
Mezzanine floor panels are installed separately from the production hall with a minimum 80 mm distance so that the largest expansions can be absorbed at the periphery (7).
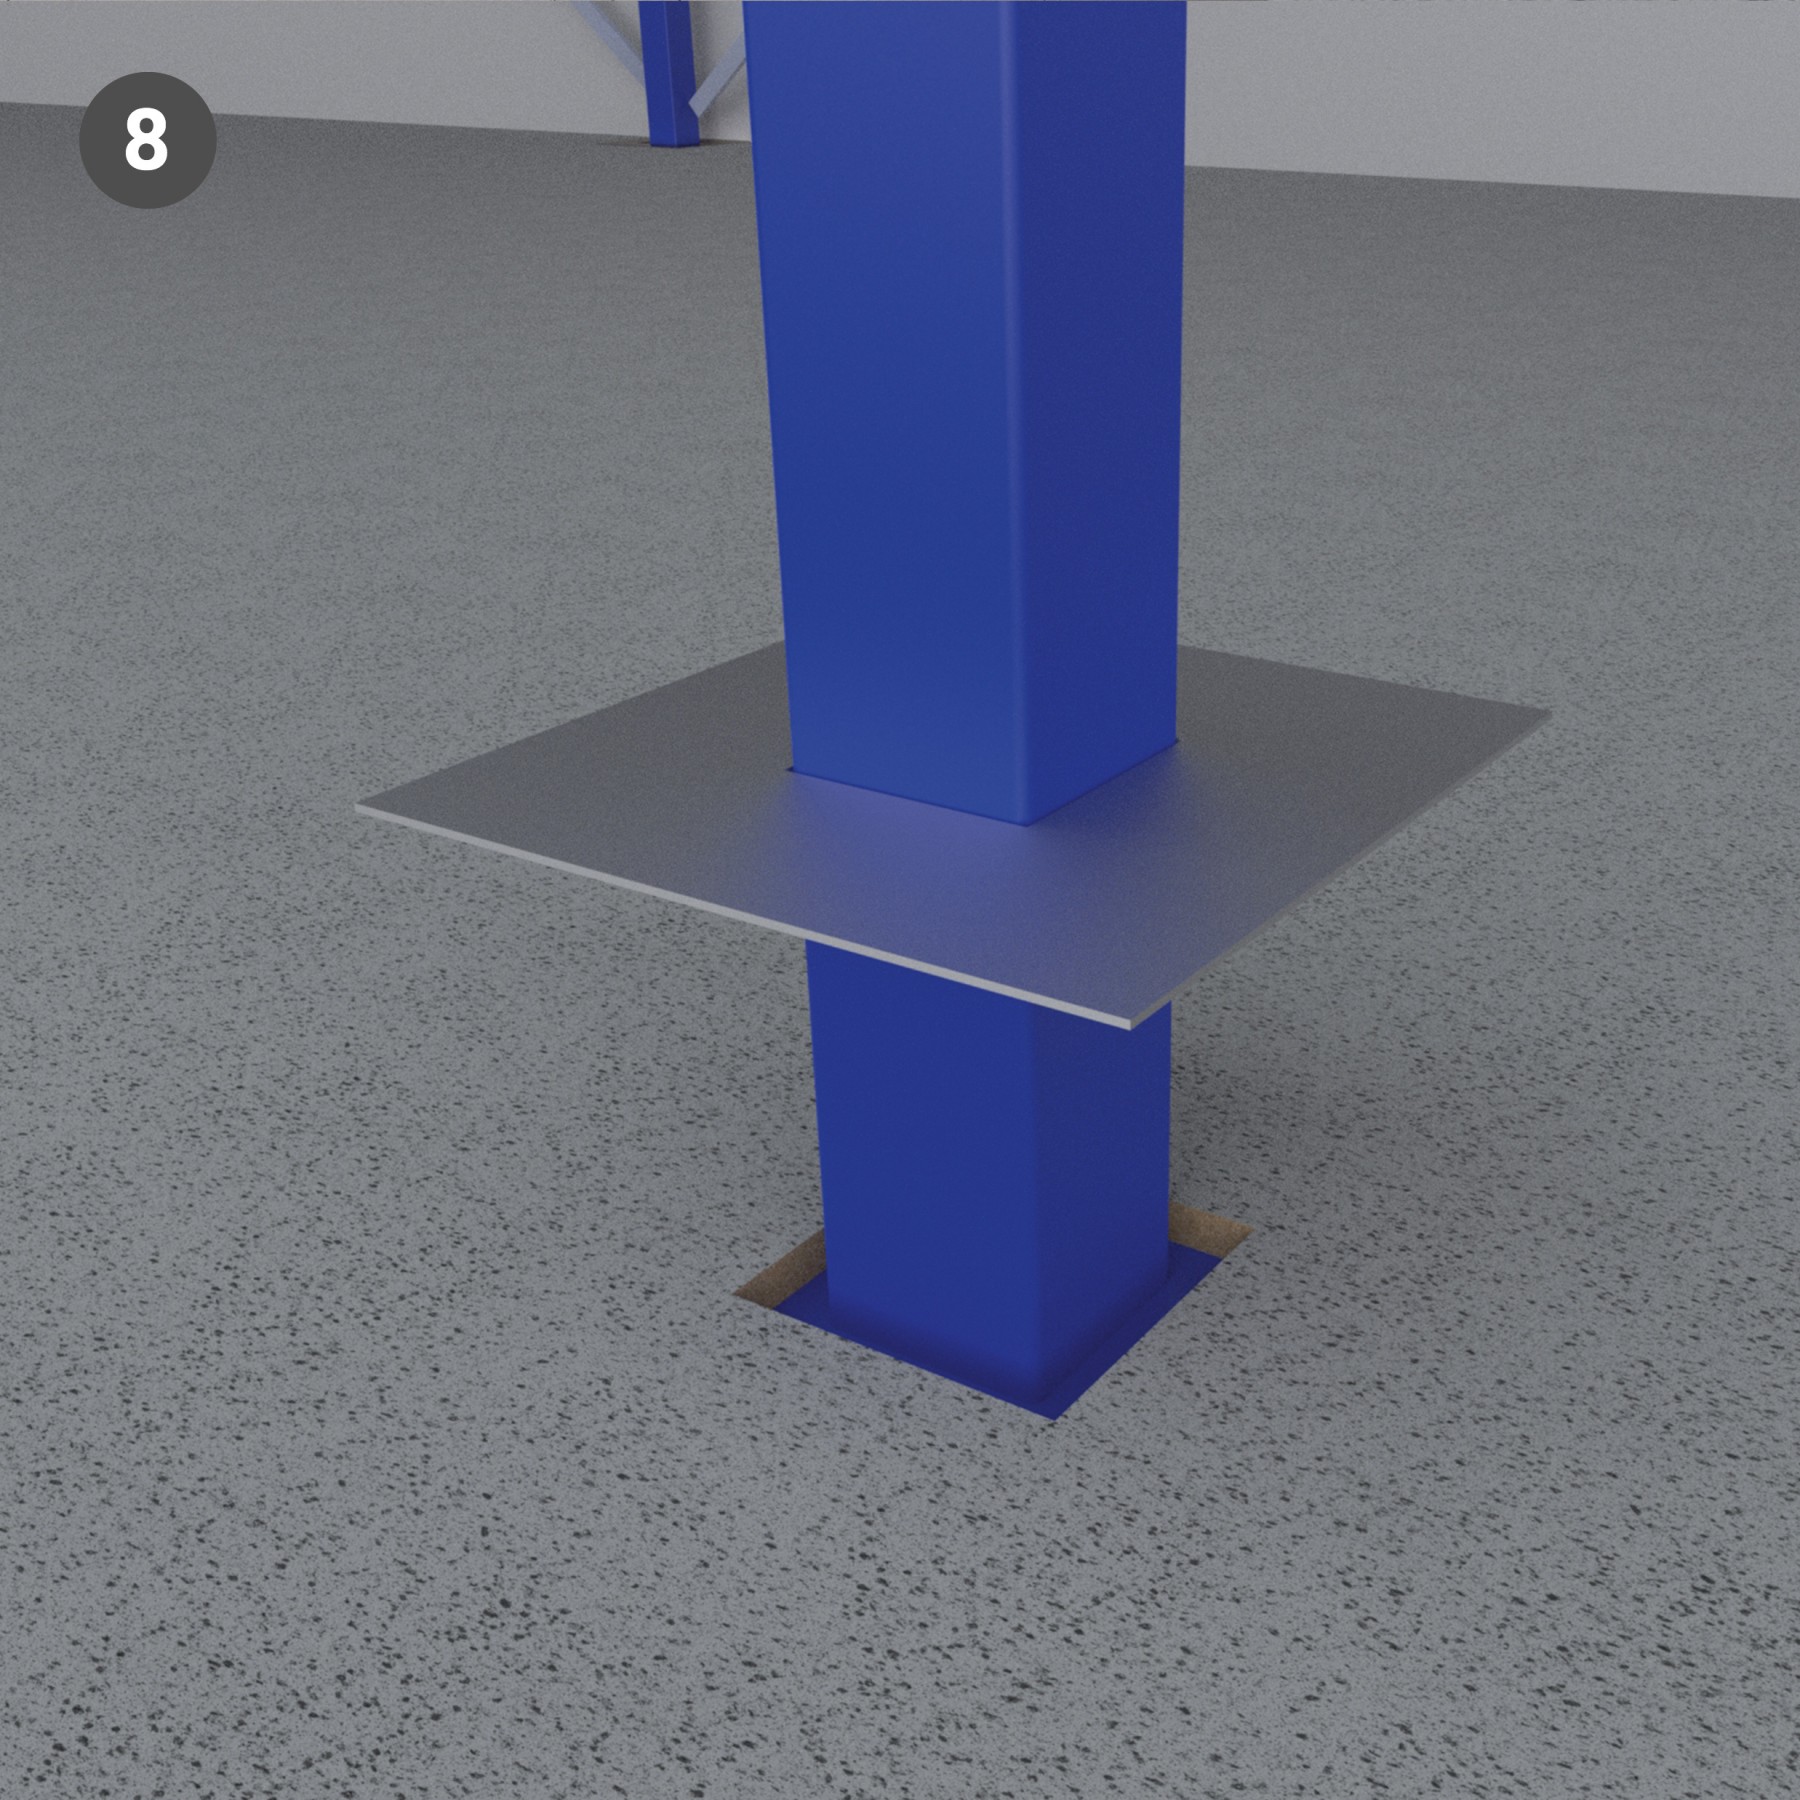
In addition, expansion joints must also be installed at columns or other objects that prevent a continuous floor (8).
Where one side of a floor surface is longer than 10 m, it is advisable to install an additional expansion joint of 10 mm every 10 m, as recommended in the standard DTU 51.3 and CEN TS 12872. This joint must be protected to prevent damage. When installing additional expansion joints, support must be ensured by, for example, installing an additional support beam.
Mezzanine floor panels can also be installed in walkways, where the long side must be fully supported by support beams. In this case, support on the short edges is not required.
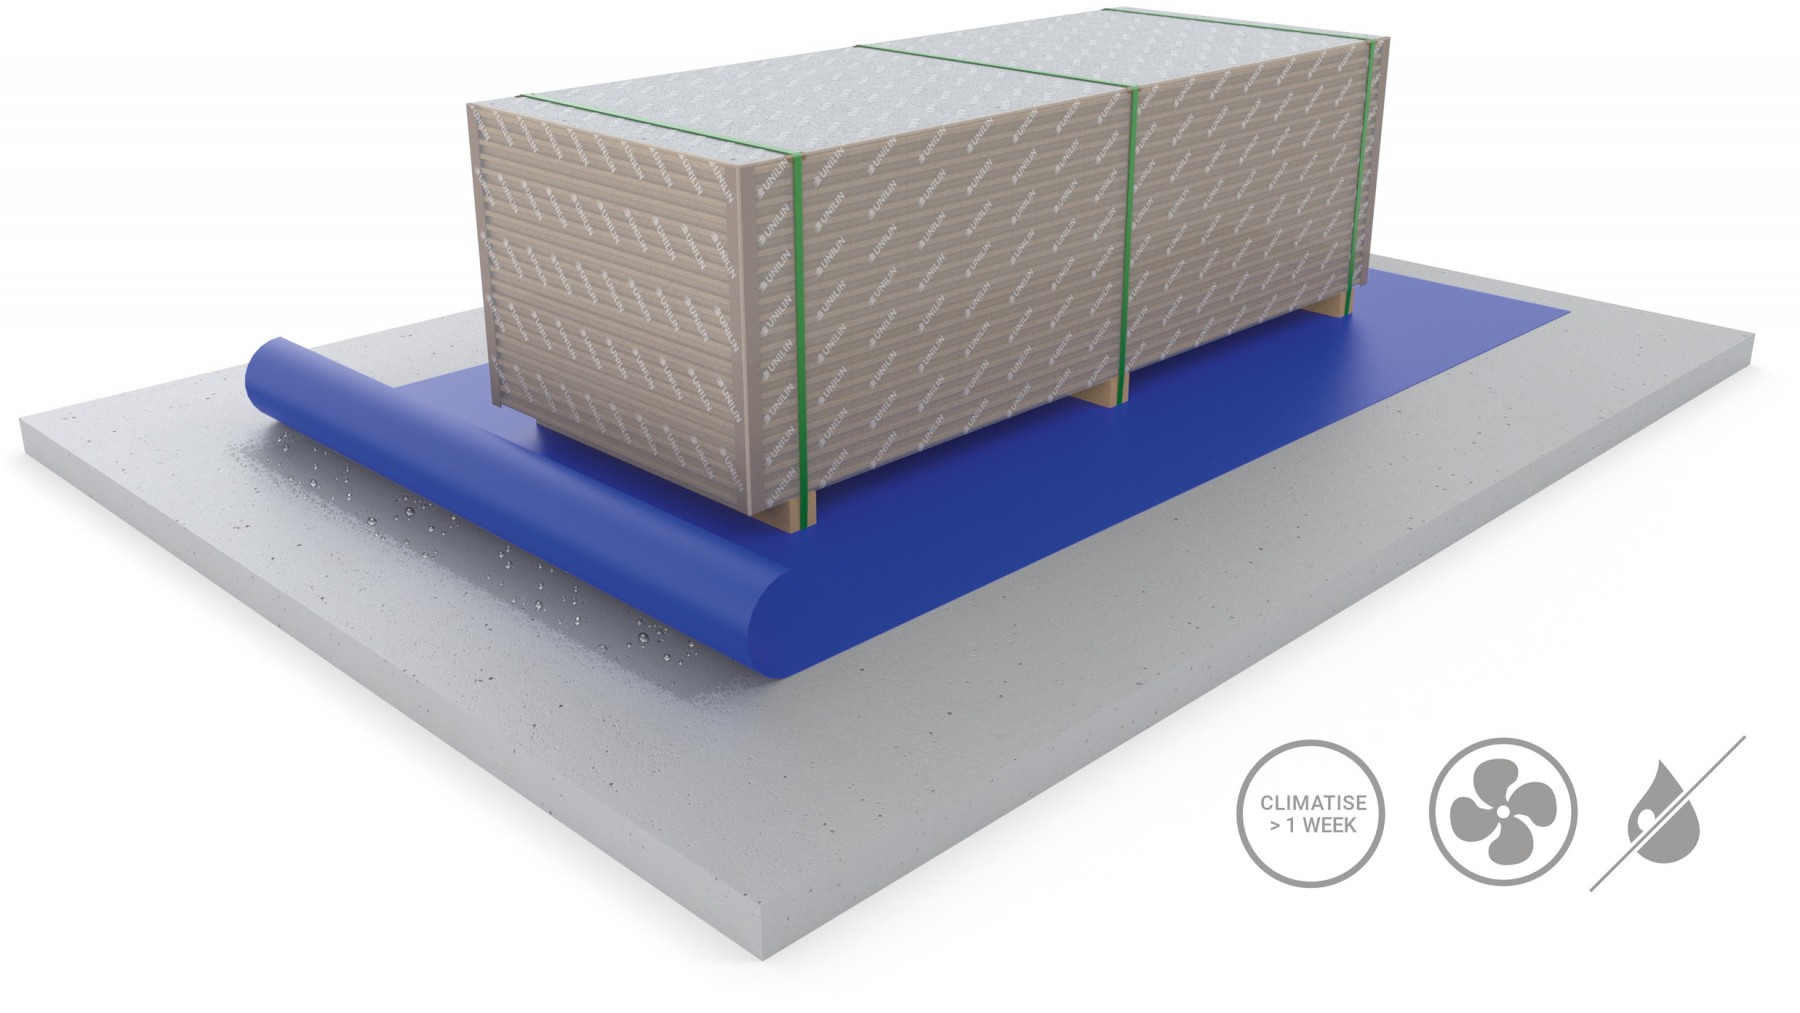
Mezzanine panels are stacked horizontally in packages and should be stored in a dry environment. Direct contact with the ground floor must be avoided by using supporting blocks or pallets. If there is a risk of damp ground, a water-tight film must be laid over the ground before the packages are stacked. The storage area must be dry and well ventilated.
We recommend having the floor panels delivered to the site at least a week before installation so that the panels can adapt to the environment. In that case, the storage conditions should be harmonised with the final application of the panels. Where there is a risk of higher humidity (e.g. in cement plants), work should be postponed until the correct conditions prevail. High air humidity can lead to a decrease in the strength and stiffness of the panels.
| Relative humidity range at 20ºC | Average equilibrium moisture content in the panel | Panel material type |
Application |
|
| Climate class 1 (dry environment) |
30 - 65% |
4 - 11% |
U7 |
Structural application in dry environment |
| Climate class 2 (humid environment) |
65 - 85% |
11 - 17% |
P5 |
Structural application in humid environment |
|
Climate class 3 (wet environment) |
>85% |
>17% |
/ |
Direct contact with water possible |
Mezzanine floors with an unfinished surface (e.g. Standard and White) may be sanded to prepare the surface for later finishing. While sanding, ensure that proper dust extraction is in place and remove all remaining dust particles afterwards. The floors can be cleaned with a brush, compressed air or a damp cloth. Direct industrial cleaning with water is discouraged on wooden floors without a closed surface finish and with welded seams.
If the panels have already been installed, damage to the surface can be repaired with a standard elastomer kit, such as Tec7 or wood paste. If the panels are still to be installed, they can firstly be repaired with PU D4 adhesive. Superfluous adhesive should be cut off after installation.
FSC® certified material available on request only.